The Best White Cake Recipe {Ever}
This post may contain affiliate links. Please read my disclosure policy.
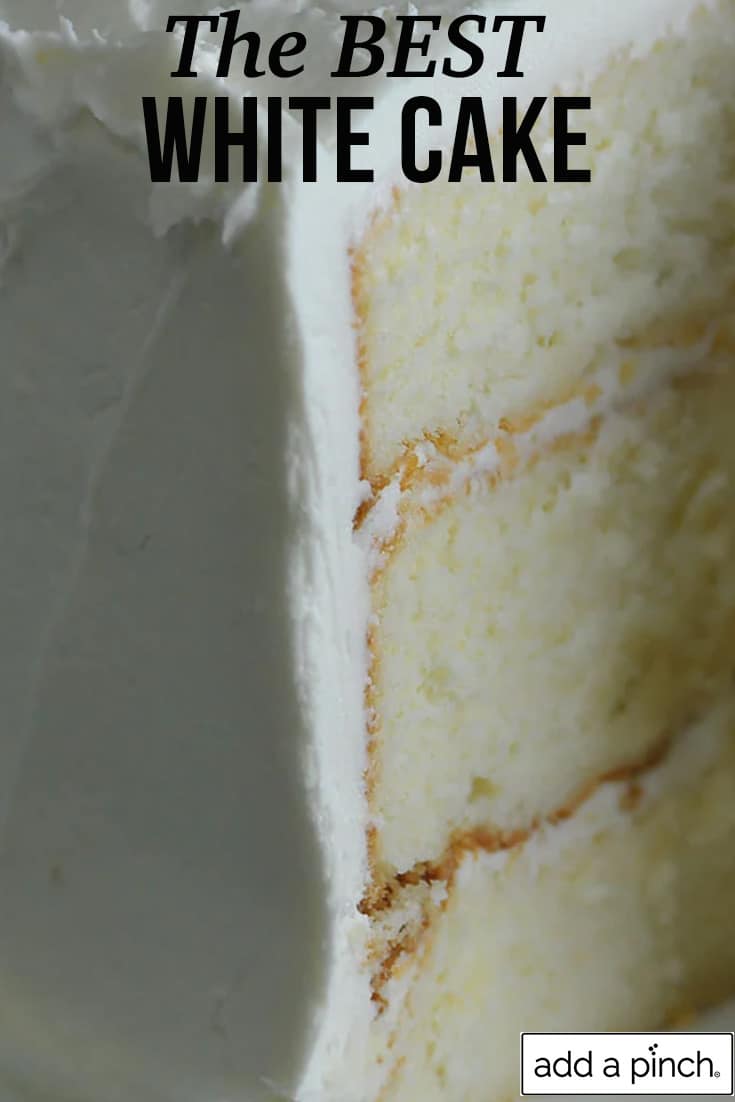
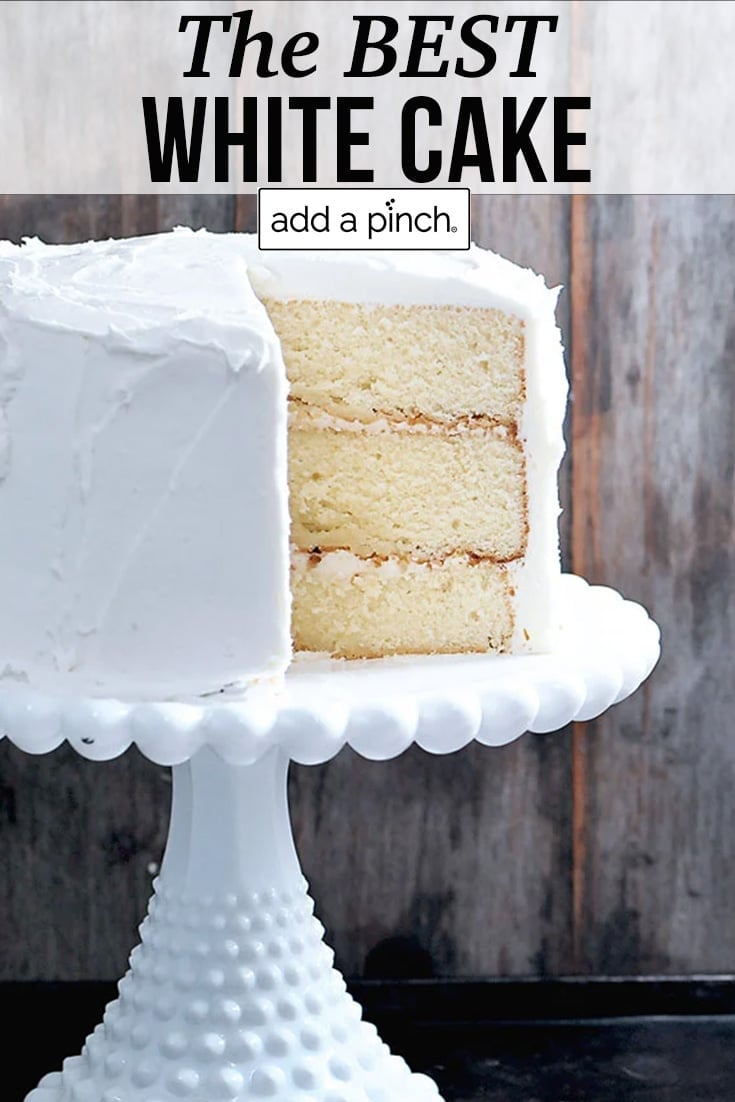
This White Cake recipe is the perfect cake for so many celebrations! This Best White Cake is simple to make and is a moist, tender cake everyone loves.
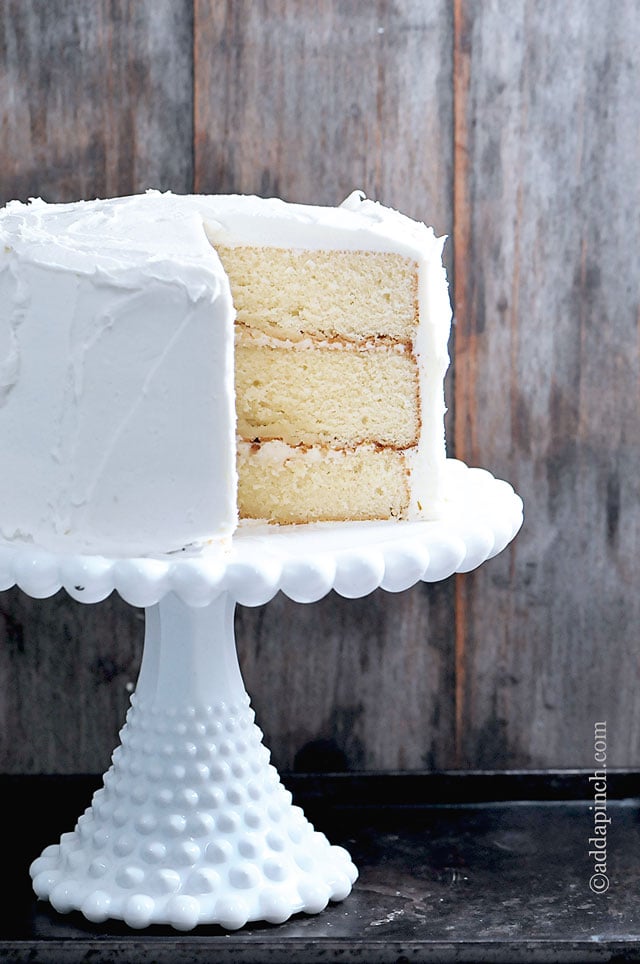
I got so many emails and comments asking for “The Best White Cake Recipe” after I shared my The Best Chocolate Cake Recipe {Ever}.
I began creating this white cake recipe by taking some ideas from the best of some of my favorite family cake recipes. The final cake recipe is decidedly white and perfect for a birthday cake, anniversaries, and even weddings.
It quickly became a family favorite cake recipe. My son declared it as “perfect,” and my brother-in-law says this has to be his birthday cake every year!
It’s definitely the Best White Cake I’ve ever tasted!
I think you’ll agree when you try it, too!
Why This Is The Best White Cake Recipe Ever!
This easy homemade white cake recipe is the perfect combination of fluffy, soft, moist, and flavorful!
- Amazing flavor. Full of buttery, vanilla flavor.
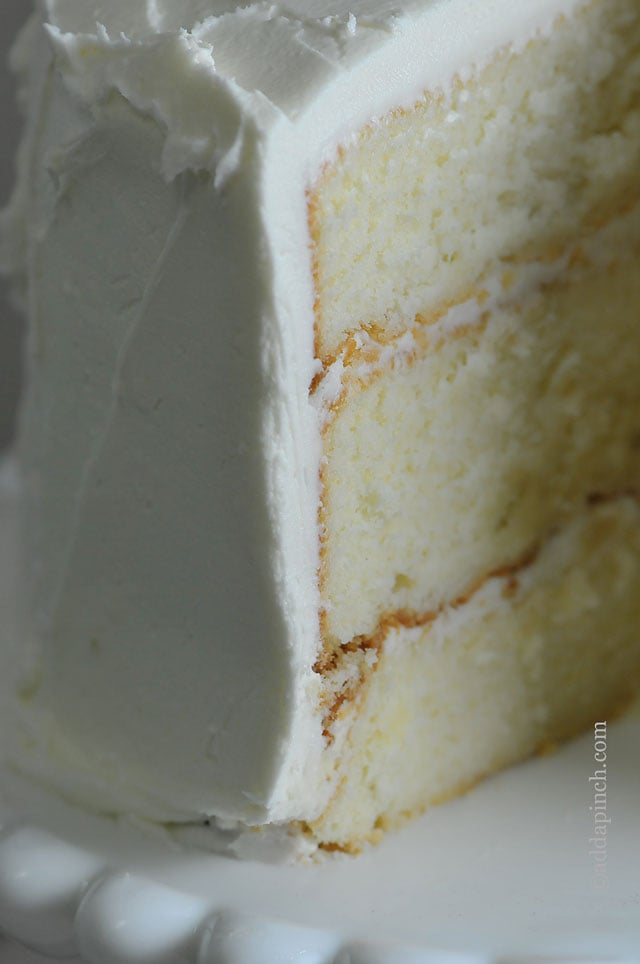
- Sturdy yet tender cake. It is so moist, with a tender stick to your fork crumb. It holds together beautifully, making slicing and serving a breeze.
- Versatile recipe. This cake recipe works well as a layer cake, cupcakes, sheet cake, or even as a bundt cake.
- Favorite cake. Always a favorite recipe! This recipe makes the best cake for special occasions and is easy enough for a weeknight dessert. It is loved for so many special celebrations such as birthdays and anniversaries, and it even makes a delicious wedding cake.
Best White Cake Recipe
Ingredients and Substitutions
To bake this cake, you’ll need these ingredients:
- butter – it is important to make sure that your butter is softened before you begin making this cake. You can use unsalted or salted butter in this recipe based on your preference.
- vegetable shortening – adds to the moisture and texture of this incredible cake.
- sugar – You’ll use granulated sugar
- eggs – While many white cake recipes use only egg whites, I decided after numerous rounds of testing that I preferred the flavor that the whole egg, including the egg yolks, lends to the cake. While the cake isn’t stark white, it is still white. Make sure to use large, room-temperature eggs before you begin.
- all-purpose flour – I use soft-winter-wheat-based all-purpose flour. In this instance, you can substitute with cake flour (or make your own cake flour with my easy tips!)
- baking powder
- salt – I use Diamond Crystal Kosher Salt. If you substitute with Morton’s Kosher salt, fine sea salt, or table salt, you will only need half the amount of the salt called for in the recipe.
- whole milk – make sure the milk is at room temperature
- buttermilk – room temperature
- vanilla extract – I prefer the flavor of vanilla in my cake and use 2 teaspoons of vanilla extract. If you like the flavor of almonds in your white cake, you can use 1 teaspoon of vanilla extract and 1 teaspoon of almond extract. This will reduce the vanilla flavor in the cake, but it is a good balance between the two. Additionally, if you want as white of a cake as possible, use a clear vanilla extract.
Step-By-Step Instructions
Preheat the oven. Begin by preheating the oven to 350º Fahrenheit.
Prepare cake pans. Prepare three 9-inch round cake pans with nonstick baking spray or coat well with shortening or butter and flour the pans, taking care to remove all excess flour.
Cream together the butter mixture. In a large mixing bowl (or the bowl of your stand mixer), cream together the butter and shortening until light and fluffy with an electric mixer. Slowly add sugar (one cup at a time) making sure to fully incorporate each cup before adding another. Mix together until light, fluffy, and white, about 4 minutes.
Next, add eggs (one at a time), making sure to fully incorporate each egg before adding another.
Whisk together the flour mixture. In another large mixing bowl, whisk together your add your dry ingredients (flour, baking powder, and salt).
Combine the milk mixture. Stir together the milk, buttermilk, and vanilla extract in a liquid measuring cup or mixing bowl.
Make the cake batter. Add a small amount of the dry ingredients (flour mixture) to the butter and shortening mixture, gently stirring after each addition. Then add a small amount of the milk mixture to the butter mixture and gently stir until just combined. Repeat alternating between adding small amounts of the dry mixture and the milk mixture to the butter mixture, just gently stirring until combined after the addition of each. Begin and end with the addition of the dry ingredients.
Final Stir and Scrape the Bowl. Gently stir all ingredients until well combined. Then, stop the mixer and scrape down the sides and bottom of the bowl, making sure that all ingredients are mixed well.
Distribute Cake Batter into Pans. Evenly distribute the cake batter between the three 9-inch cake pans and place the pans into the oven.
Bake the Cake. Bake for 25-30 minutes, or until a toothpick or cake tester inserted in the center comes out clean. Please don’t open and close the oven door a lot while the cake is baking, as the oven temperature drops each time the door is opened. You can follow my tips for how to tell when your cake is done.
Remove from Oven and Cool. Remove the cakes from the oven when done and allow them to cool slightly in cake pans for about 5 minutes. Then gently place the cake layers on a wire rack to finish cooling completely. This is important because cakes left in the cake pans for too long to cool may sweat, making it possible for them to stick to the pans.
Frost the Cake. Frost your cake with your preferred frosting.
White Cake Frosting Options
I used my fluffy white Vanilla Buttercream Frosting, which I doubled when I frosted the cake. It’s perfect on this cake, but you can use any favorite frosting.
Other Delicious Frostings
Strawberry Buttercream Frosting,
Perfect Chocolate Buttercream Frosting
Best White Cake Success Tips!
1. Follow the recipe. Follow my recipe instructions exactly for mixing the cake to ensure success and make it as white as possible.
2. Use room temperature ingredients. Butter, eggs, milk, and buttermilk all should be at room temperature to ensure the best mixing into the cake batter. This makes for the best texture and soft crumb of the finished cake.
3. Prepare the cake pans. Prepare your cake pans with nonstick baking spray or coat well with shortening or butter and flour, taking care to remove all excess flour.
4. Mix the cake batter well but not too much. Cream the butter, shortening, and sugar until light and fluffy, about 3 to 5 minutes. Don’t overbeat when adding eggs and other ingredients. Just mix gently until incorporated well into the batter.
5. Cool the cake layers. Make sure you let the cake layers cool slightly for 5 minutes before removing the cake layers to a wire rack to cool completely. Set a timer!
How to Store and Freeze this Cake
To store. Store leftover cake at room temperature under a cake dome or covered with wrap for up to 3 days. Storing in the refrigerator tends to result in a dry cake.
To freeze. Let the cake layers cool completely. Wrap them well with plastic wrap and then with foil. Put each layer into a freezer bag and freeze for up to 2 months.
To serve from frozen. Allow the cake layers to thaw in the refrigerator overnight. The next day, the layers are ready to fill and frost as desired.
The next time you need a white cake recipe, give this one a try. I think you’ll love it!
Here’s my White Cake Recipe. My family calls it the best ever.
The Best White Cake Recipe {ever}
Equipment
Ingredients
- 1 cup (226 g) butter , softened
- 1/2 cup (92 g) shortening
- 3 cups (594 g) granulated sugar
- 5 large (250 g) eggs, room temperature
- 3 cups (360 g) all-purpose flour
- 2 teaspoons (8 g) baking powder
- 1/4 teaspoon (0.7 g) kosher salt
- 1/2 cup (113.5 g) whole milk, room temperature
- 1/2 cup (113.5 g) buttermilk, room temperature
- 2 teaspoons (9.4 g) vanilla extract
Instructions
- Prep. Preheat oven to 350º F. Prepare three 9-inch round cake pans with nonstick baking spray, brush with homemade cake goop (pan release), or coated well with shortening or butter and floured, taking care to remove all excess flour.
- Cream together butter mixture. Cream together butter, shortening and sugar until light and fluffy with an electric mixer. Mix together for 4 minutes until light, fluffy and white. Add eggs one at a time, making sure to fully incorporate each egg before adding another.
- Whisk together the flour mixture. Whisk together the flour, baking powder, and salt in a mixing bowl.
- Combine the milk mixture. Stir together the milk, buttermilk, and vanilla extract in a liquid measuring cup or bowl.
- Make the cake batter. Alternately add the flour mixture and the milk mixture to the butter mixture, beginning and ending with the flour mixture. Make sure to mix just until combined to prevent overmixing. Stop the mixer and scrape down the sides and the bottom of the bowl, making sure to have all ingredietns mixed well into the cake batter.
- Bake and cool the cake. Evenly distribute cake batter between cake pans and place pans into oven. Bake for 25-30 minutes, or until a toothpick or cake tester inserted in the center comes out clean. Remove and allow to cool slightly in cake pans for about 5 minutes, then cool completely on a wire rack.
- Frost and serve. Frost the cake as desired.
Notes
Best White Cake Recipe Success Tips!
1. Follow the recipe. Follow my recipe instructions exactly for mixing the cake to ensure success and make it as white as possible. 2. Use room temperature ingredients. Butter, eggs, milk, and buttermilk all should be at room temperature to ensure the best mixing into the cake batter. This makes for the best texture and soft crumb of the finished cake. 3. Prepare the cake pans. Prepare your cake pans with nonstick baking spray or coat well with shortening or butter and flour, taking care to remove all excess flour. 4. Mix the cake batter well but not too much. Cream the butter, shortening, and sugar until light and fluffy, about 3 to 5 minutes. Don’t overbeat when adding eggs and other ingredients. Just mix gently until incorporated well into the batter. 5. Cool the cake layers. Make sure you let the cake layers cool slightly for 5 minutes before removing the cake layers to a wire rack to cool completely. Set a timer!How to Store and Freeze this Cake
Make Ahead. This cake can easily be made ahead of serving. Bake and frost as desired and store at room temperature (or in the refrigerator based on the frosting used) under a cake dome or covered with wrap for up to 3 days. To store. Store leftover cake at room temperature (or in the refrigerator based on the frosting used) under a cake dome or covered with wrap for up to 3 days. To freeze. Let the cake layers cool completely. Wrap them well with plastic wrap and then with foil. Put each layer into a freezer bag and freeze for up to 2 months. Allow the cake layers to thaw in the refrigerator overnight. The next day, the layers are ready to fill and frost as desired.General Recipe Notes:
- Cupcakes. This recipe makes approximately 24 cupcakes when the cupcake tin is filled more than 3/4 full. When filled 1/2 full, this recipe makes approximately 36 cupcakes. Bake for approximately 18 minutes.
- Original recipe. If you preferred the original white cake recipe (published in 2013), it used 1/2 teaspoon baking powder and 1 cup buttermilk with no whole milk.
- High Altitude. If you live in a high-altitude environment, you’ll need to make sure to follow recommended baking adjustments for your altitude.
Nutrition
Nutrition information is automatically calculated, so should only be used as an approximation.
Comment from a Pastry Chef
I shared this comment from The Pastry Life, comment #1062 to this area of the post as it might be helpful to you as you bake this cake.
“Hi there, I am a pastry chef and have lots of knowledge of cakes, and why they do the funny things that they do. Let me start of by saying this cake is delicious, moist and fluffy! This is thanks to the seemingly large amount of sugar and fats, so do not reduce the amounts or make substitutions! If you’re that concerned about the healthiness of this cake, you should probably just avoid it.
This cake does not rise much, but that does not negatively affect its fluffiness. I followed the directions exactly, except for one very important step which I believe is why my cake is so fluffy inside and did not sink. Cream your butter, shortening and sugar altogether until very white and fluffy (about 4 minutes). After that, follow the instructions to a T. If you over beat after adding the eggs, they will produce a tougher cake. Take extra care while rotating pans as to not deflate the cakes, and resist the urge to open your oven door to peek except when you need to rotate.
This cake does form a bit of a crust on top from the high egg and sugar content, which makes it more difficult to tell when it is done. Your best hint is your nose. If you can smell cake, then check it! If its not jiggly, take it out and scoop a little bit out of the middle to see if it’s done (you’re gonna cover it with frosting anyway). Don’t trust the toothpick-test!
Sorry for writing a novel, I just know how hard it is to make a great white cake and this recipe is probably the best I’ve had yet, so it made me sad to see how many people were disappointed by it due to their lack of pastry knowledge and proper method.”
Thanks for your detailed comment, The Pastry Life!
Here’s to good cake! Enjoy!
Robyn xo






I’m cooking at roughly 4,300 ft and I made 12 cupcakes and a 9/13. My cupcakes fell! I’m a fairly experienced baker and have not had this problem before. Any tips?
Robyn.. do you know if it works for high altitude as is or are adjustments required?
Thanks.
For information on high alltitude baking…….Check the back of any boxed cake mix next time you are in a grocery store.
It is a long time since I had to know this while living in Colorado. But I remember seeing it listed there.
So I just made this cake, and the batter was delicious!. Unfortunately the finished cake seems to be stuck in the pan. Help! I let the cakes cool in the pans the suggested 5 minutes, I ran a butter knife along the sides of the pans and inverted the cakes on wire racks. The cakes seem to be stuck in the pans with super glue. I sprayed the bottom and sides of the pans with a well know non stick spray before baking. Now what? I hate to have to srap the cakes and would especially hate to attempt this recipe again and have the same thing happen. Does anyone have any suggestions?
Hi CJ,
Did you use a nonstick baking spray or nonstick cooking spray?
Good question. I used a cooking spray. I didn’t realize there was a difference, I knew there must have been something. For what it is worth, I was able to salvage the cakes by cooling them in the pan to room temperature. I then wrapped the cakes, pan and all in plastic wrap and popped them in the freezer overnight for 6 hours. In the morning I just took the frozen pans, ran a knife around the edge of the cakes and started tapping the sides of the pans on my counter to loosen the cakes. To my amazement all three frozen cakes popped out perfectly! We won’t be cutting the cake until tonight, but the crumbs I sampled were well worth chaos. Thank you so much demystifying my mistake and the best cake recipe ever!
I’m so glad we figured out what happened! Nonstick baking spray is formulated with a flour in the spray to prevent baked goods from sticking. If you don’t have that, I recommend preparing the pans with shortening or butter and then lightly flouring to remove any excess flour. Glad the cakes came out for you and that’s a great trick to remember!!!
This just happened to me and i could not figure out why! Now I know. NS cooking spray. UGH! I also know how to remedy it next time w/o throwing away my cakes (because that is what I did). On to a second round of baking and using butter on my cake pans. The cake pieces tasted really good so I can’t wait to get a cake that I can frost. 🙂
Hi,
I find that if I spray or grease my pans & then cut wax paper to fit the bottom of the pans, then spray or grease & lightly flour the wax papered bottom before pouring in the batter, my cake layers always come out easily. Once cooled you just peel off the wax paper.
In the event you forget that step……Try holding the cake pan over a hot burner long enough to heat the bottom of the pan which then loosens the cake from the cooled pan.
Good Luck!
I personally find it better to ALWAYS use Crisco or palm oil and then flour the pan for all my cakes, even in the non-stick pans , and wax paper does work wonders too!
The spray sometimes does not work well, especially if your pan has any chips or dings or scratches in it. Even the non- stick pans that get chips or scratches or rough spots
I personally cool my cakes on a rack then put them in the freezer in the pan , and if the cakes does not pop out, I put it on the burner for about 30 seconds or submerge the bottom of the pan in hot water and it will pops right out.
We design a lot of cakes so working with a par to frozen cakes works so much nicer , you do not have to worry about the cake walls breaking, and for super moist cakes they can be very delicate when trying to remove from the pan or frosting or crumb coat.
Hope this helps!
I made this for my daughter’s nineteenth birthday. It is also the first homemade cake that I have ever made. It was very easy and so delicious. Nobody could believe that I made it at first, but they sure were happy that I did. I’ll never use a box or pay someone to bake me a cake, ever again. Thank you for sharing your recipe and taking the time to answer everyone’s questions. You have changed my life. I know that might sound corny, but I now have the confidence to bake. Thank you, thank you, thank you!!
Did you use the recipe that says 1/2 cup of buttermilk and a 1/2 cup of milk?
Yes, that’s the way I did it.
I need to make a 9 by 13 cake and want to use this recipe. Would the cook time be the same?
I too want to make a sheet cake out of this recipe I would imagine normal bake time for a 9×13 is 50to 60 minutes?
Hello R,
Please tell me where you got your lovely white cake stand?
Thanks!
Hi! It was my Grandmother’s.
I would also like to ask what can I use in the UK as a substitute for vegetable shortening? Would Trex cooking vat be the same?
AWESOME recipe thank you so much for sharing!!!
My question was have you or anyone else made this cake so that it looks white in appearance. If I try and use only egg whites will it taste the same. Or if I add white food coloring will it taste the same?
I LOVE your chocolate cake recipe, I’m about to try this one this weekend for my Grandmas 93rd birthday….. can you tell me if theres any direct purpose for the shortening? Can I just use more butter? I just don’t use it that much, so I hate to buy it and have the rest go to waste 🙂 Thank you
Hi Sarah,
The shortening makes the cake more tender and moist. You can buy them in baking sticks at the grocery store.
Oh super! Thank you for the prompt reply 🙂 cheers- Sarah
I want to make this! Do I use salted or unsalted butter?
Hi Monica,
You can use whichever you prefer. I generally have salted on hand and use that.
Is it too late to ask you how tall this cake is? I want to make a rainbow 6 layer cake and I’m not sure if I should double the recipe for this /:
Hi,your cake looks divine and I have decided to bake it for a big birthday party I’m having.My questions are:can I ice this cake with fondant icing and if I do this on Thursday does it have to stand in the fridge and for how long can it do so?:Do you use anything else for filling the cake besides the buttermilk icing?:I’m making one 11inch round cake and one 9inch ,how much batter will I need,I thought perhaps double it?Also how long will they each bake for?Thank you very much.
I would triple the recipe. I recently made the rainbow cake and it takes a lot of cake. So try with a double first and if you need more colours for your rainbow make another batch. i’m going to try this recipe tonight. 🙂 sounds yummy.
this cake makes three tall layers– about 6 inches tall at least. You could torte it if you wanted more layers.