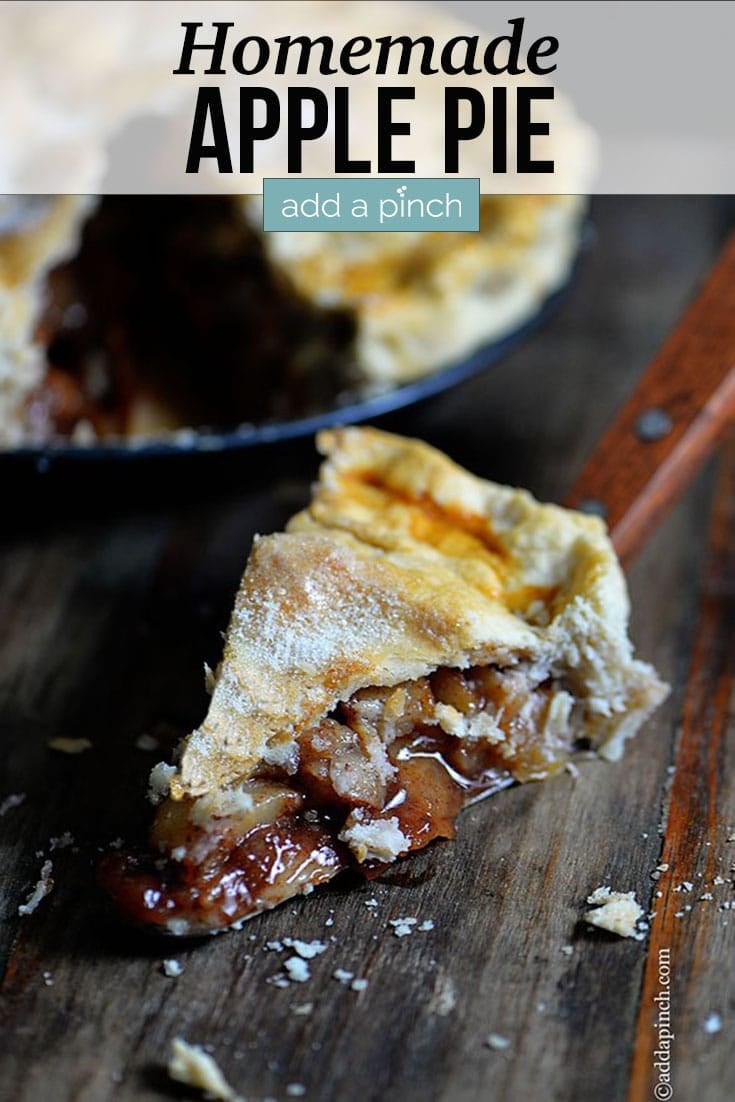
Easy Apple Pie Recipe
This post may contain affiliate links. Please read my disclosure policy.
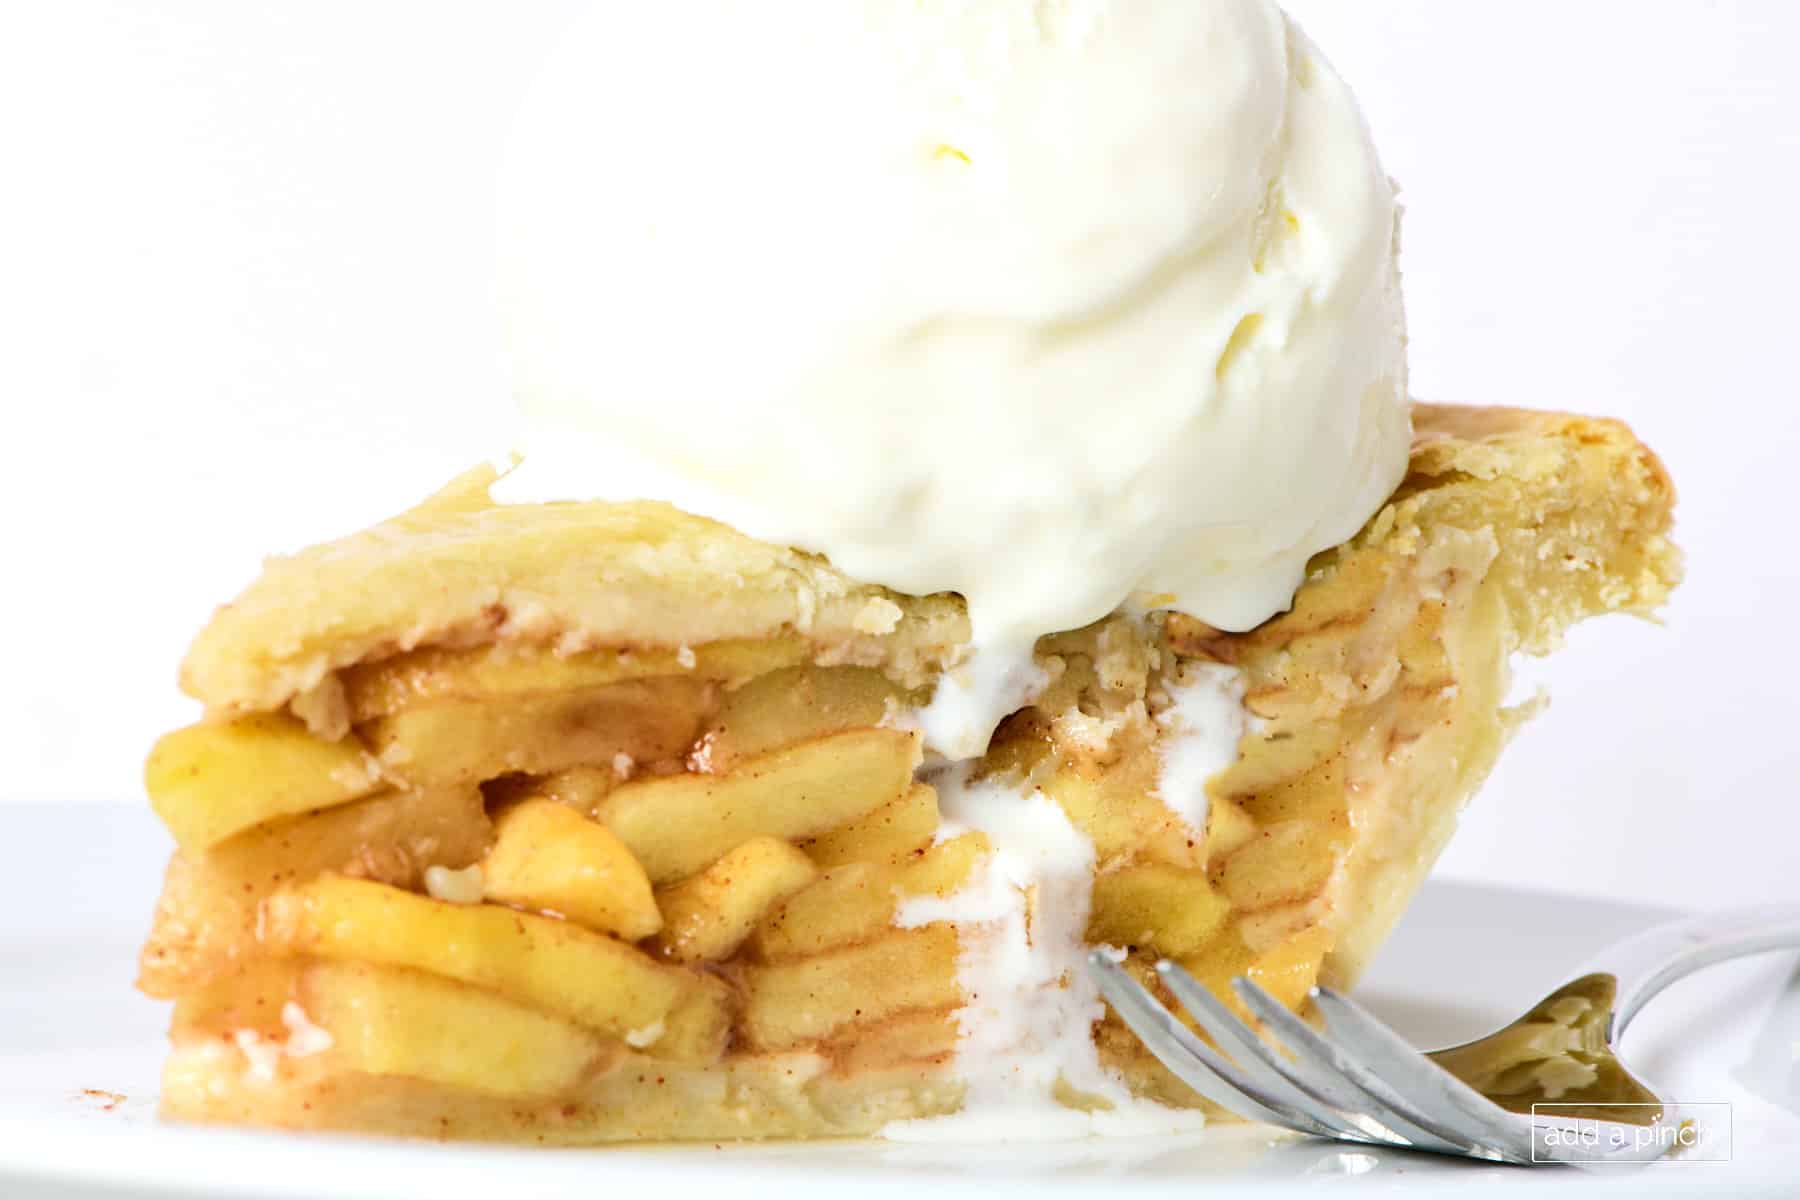
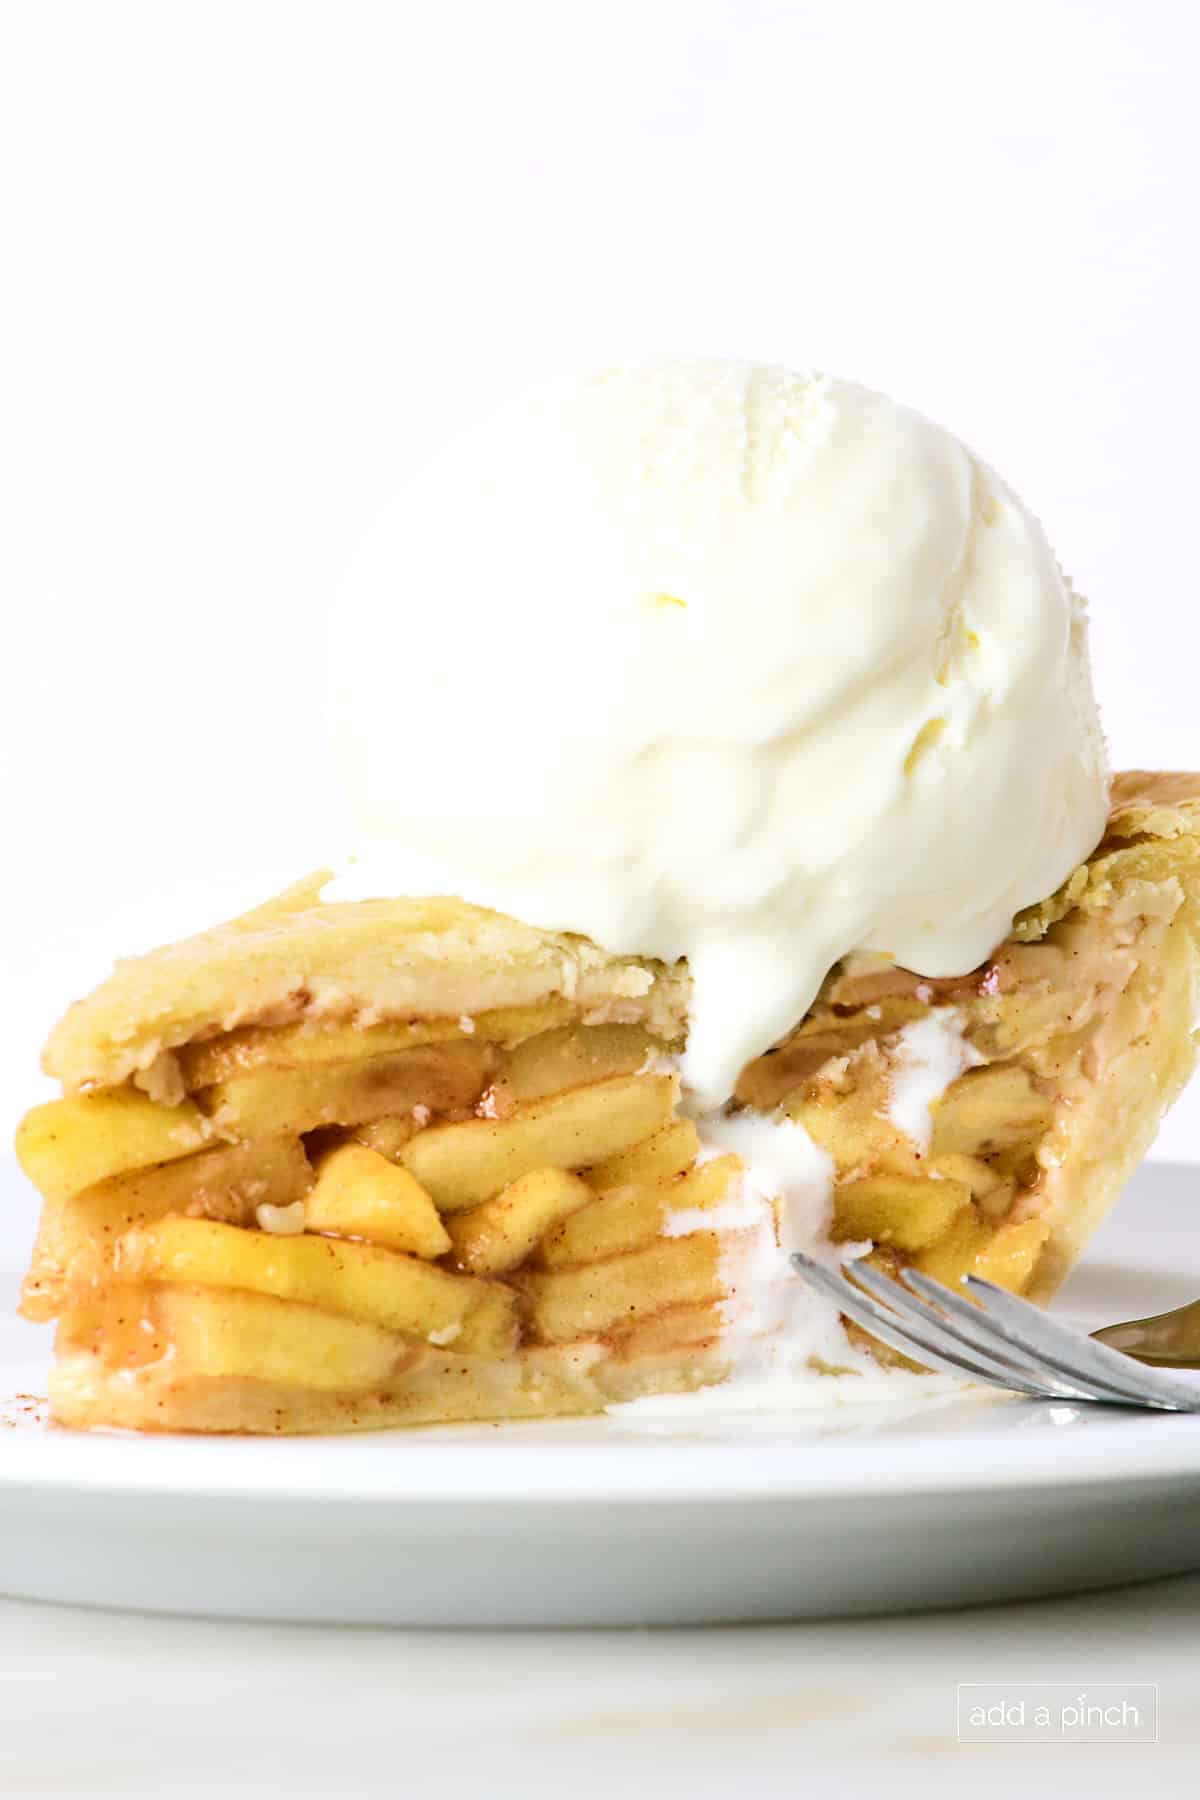
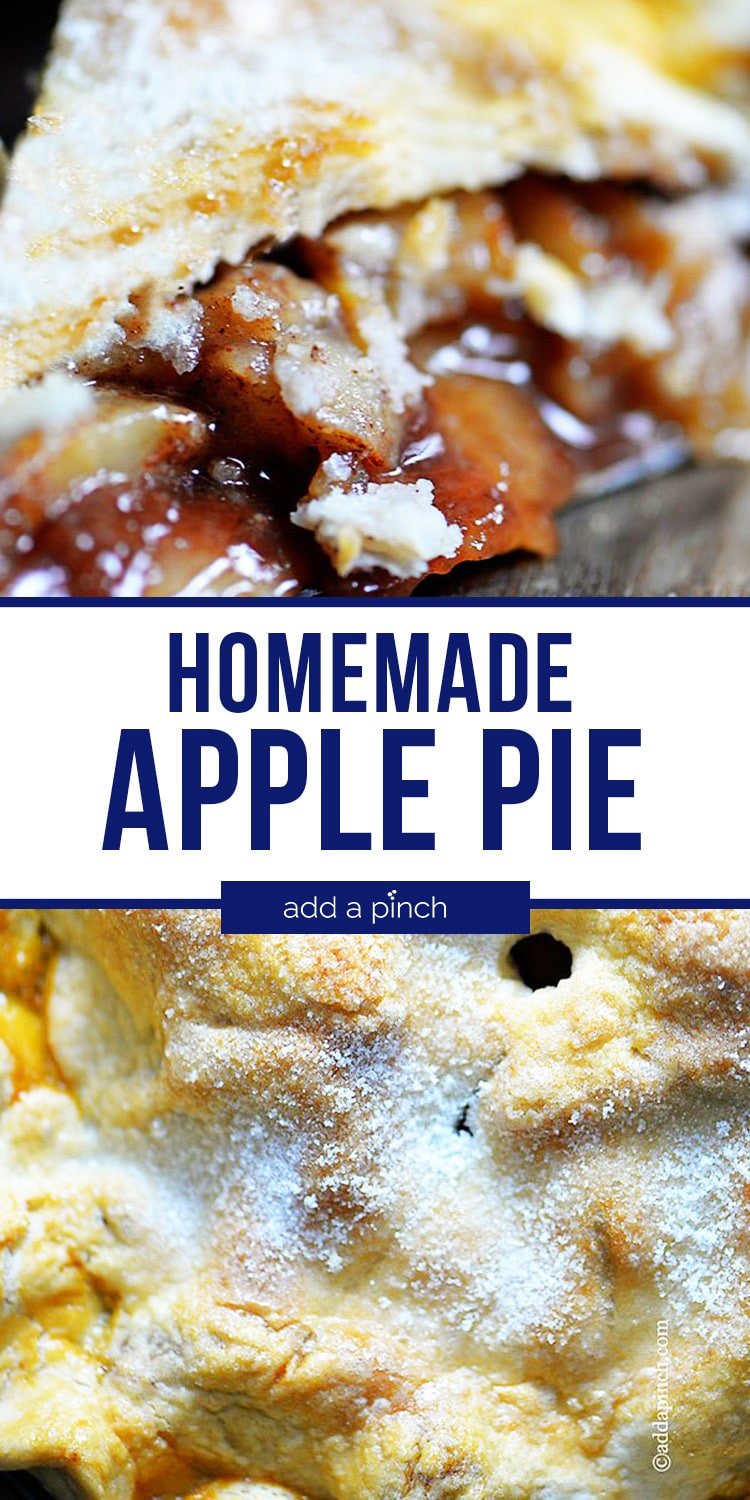
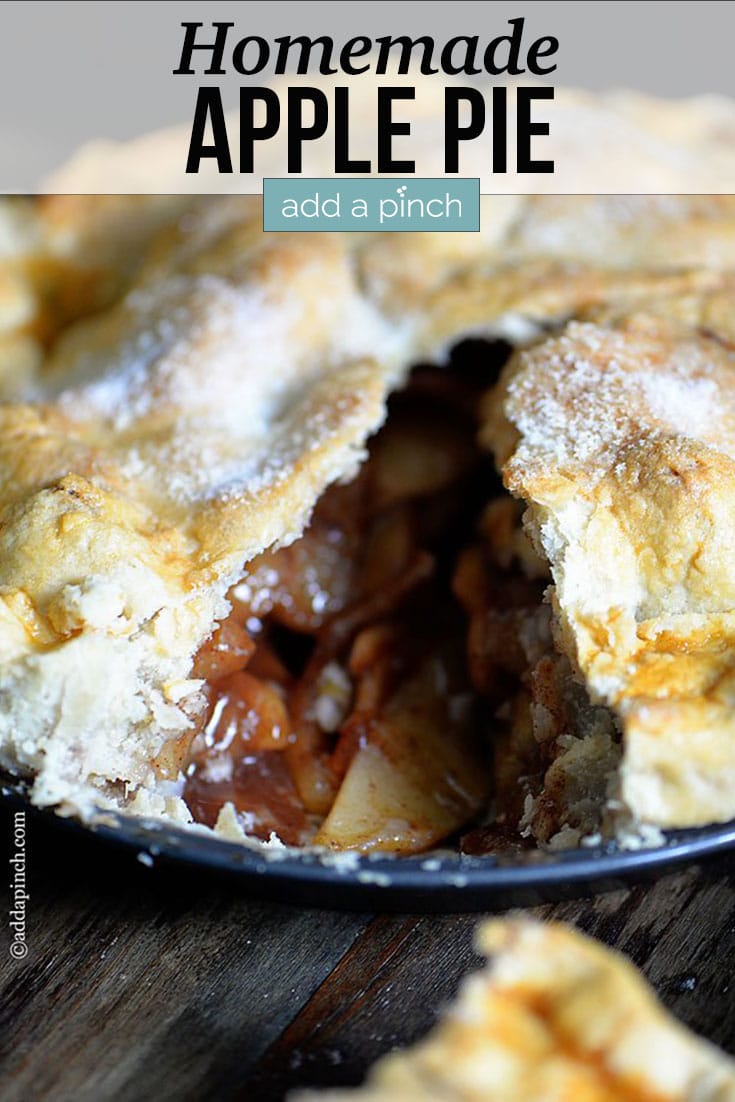
This Easy Apple Pie Recipe delivers a classic, homemade dessert with tender, sweet spiced apples nestled in a flaky, buttery pie crust. Perfect for holidays, gatherings, or cozy nights, it’s make-ahead and freezer-friendly, and it’s a crowd-favorite.
My Favorite Apple Pie Recipe
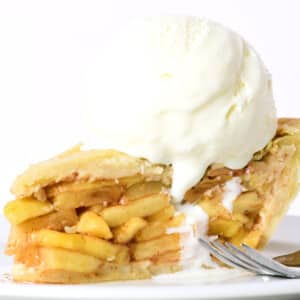
Imagine the cozy, comforting feeling from a warm slice of apple pie, fresh from the oven, with its golden crust and the delicious aroma of the spicy apple filling! This recipe was passed down from my grandmother, and it is one I will forever treasure and one I love for creating memories around the table. With a few simple ingredients and foolproof steps, you’ll have a pie that looks as stunning as it tastes. Whether topped with a scoop of vanilla ice cream or enjoyed on its own, this apple pie is sure to become your family’s favorite too.
I first shared this recipe in 2013, along with the story of my Grandmother walking me through making it as a newlywed. I know recipe stories aren’t always loved by those simply looking for a tried and true recipe to make, but I can’t remove it from this recipe as it’s too special to me. I’ve moved it below the recipe card so that if you’d like to read it, you can.
Why You’ll Love This Apple Pie Recipe
- Buttery, Flaky Pie Crust: Double recipe of my homemade pie crust that’s crisp and tender, but you can also use store-bought or frozen for convenience.
- Perfectly Flavorful Filling: A mix of sweet and tart apple slices with cinnamon and sugar for a balanced flavor that’s not too sweet.
- Customizable: Swap apples or add a lattice top to add your own touch.
- Make-Ahead/Freezer Friendly: Prep the crust or the entire pie ahead of time.
- Simple and Tested: Basic ingredients, simple to make, and perfected through generations.
How to Choose the Best Apples for this Pie Recipe
I have found through years of testing and experimenting that a combination of apples works best in this apple pie recipe for their delicious texture and flavor. While my Grandmother only used one type of apple in her apple pie, I love using a mixture of baking apples for their softness, eating apples for their crispness and texture, and Granny Smiths for their tartness. However, you can experiment with any combination of apples you prefer.
- Tart Apples: Granny Smith
- Baking apples: Cortland, Braeburn, Rome
- Eating Apples: Honeycrisp, Fuji, Sweetango
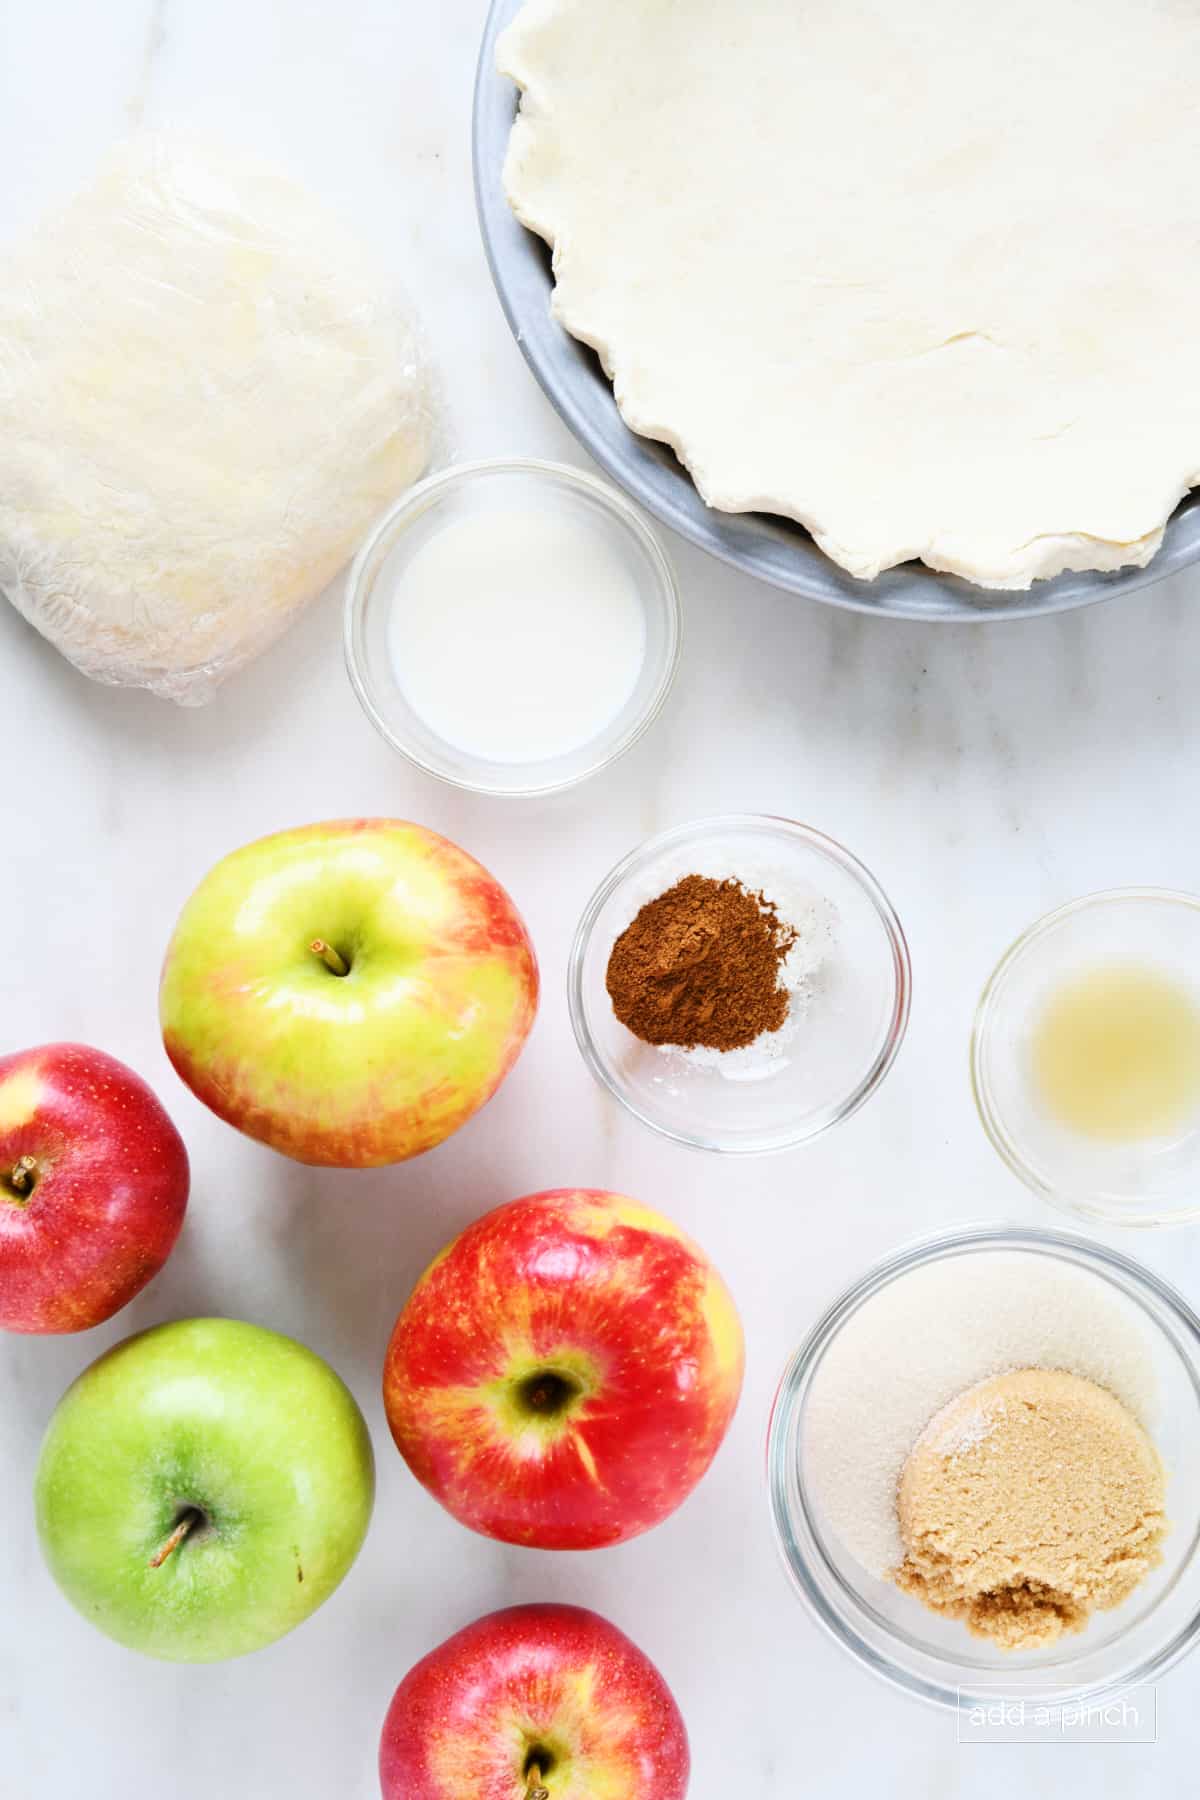
Ingredients
Be sure to see the recipe card below for the full listing of ingredients, instructions, notes, and estimated nutritional information.
- Apples: A mix of tart (Granny Smith) and sweet (Honeycrisp, Fuji) apples for balanced flavor and texture. About 5 medium apples, sliced 1/4-inch thick.
- Pie Crust: Two 9-inch homemade pie crusts (see my pie crust recipe) or store-bought.
- Lemon Juice: Prevents apple browning and adds a bright flavor.
- Sugar: I use a combination of Brown Sugar and Granulated Sugar. Adds caramel-like depth and sweetness. You can use all of one type if you wish.
- Apple Pie Spice: Alternatively, use ground cinnamon for a warm flavor.
- Kosher Salt: Enhances the flavor.
- Vanilla Extract: Pure vanilla for a rich flavor.
- Cornstarch: Thickens the apple filling for the perfect slice.
- Milk: For brushing on top of the crust to make it golden. Substitute with an egg wash (1 egg + 2 tbsp water).
- Coarse Sugar (optional): For a top with an extra sparkle and crunch.
Ingredient Swaps
- Gluten-Free: Use a 1:1 gluten-free flour blend for the crust.
- Vegan: Use plant-based butter as a swap for the butter in the crust and use a vegan-friendly sugar.
How to Make the Best Apple Pie Recipe
Here’s how you’ll make my favorite apple pie:
Step by Step Instructions
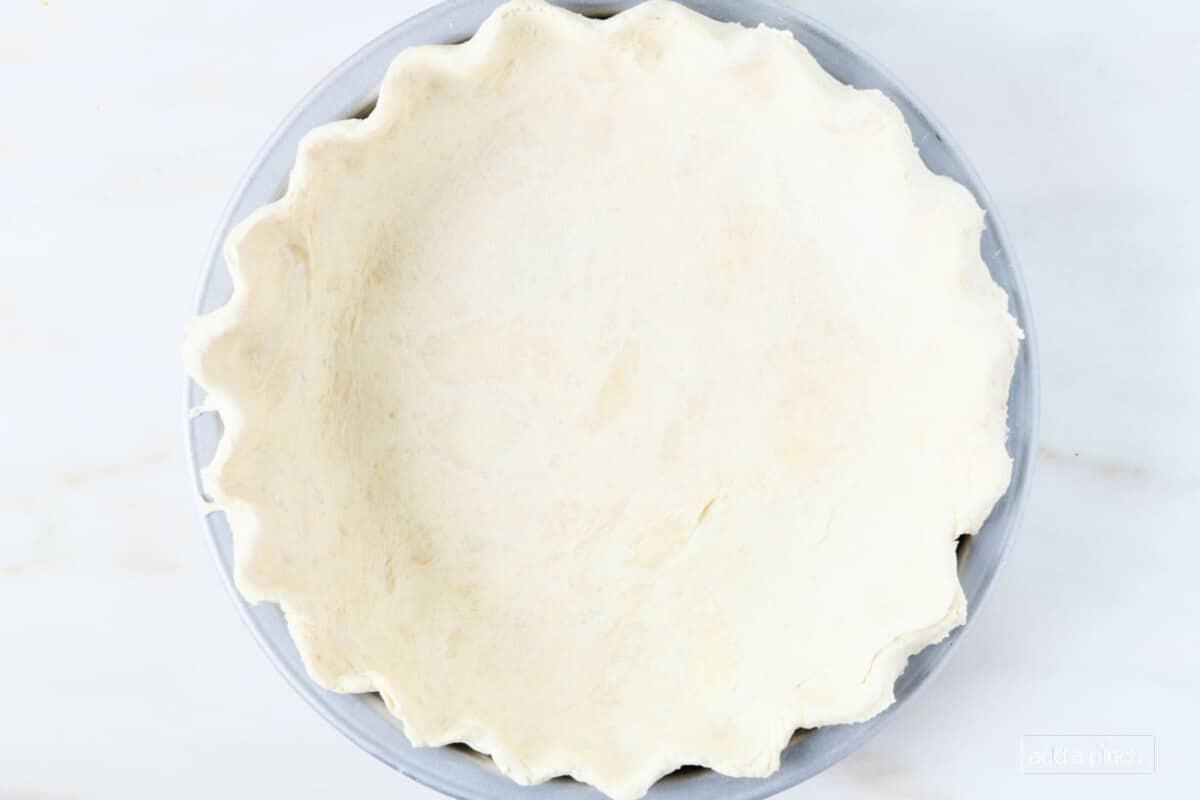
- Preheat oven to 350°F. Butter one 9-inch pie plate. Prepare two 9-inch pie crusts. Place the bottom crust in the pie plate, crimp edges, and freeze for a bit as directed. Roll out the second crust and set aside.
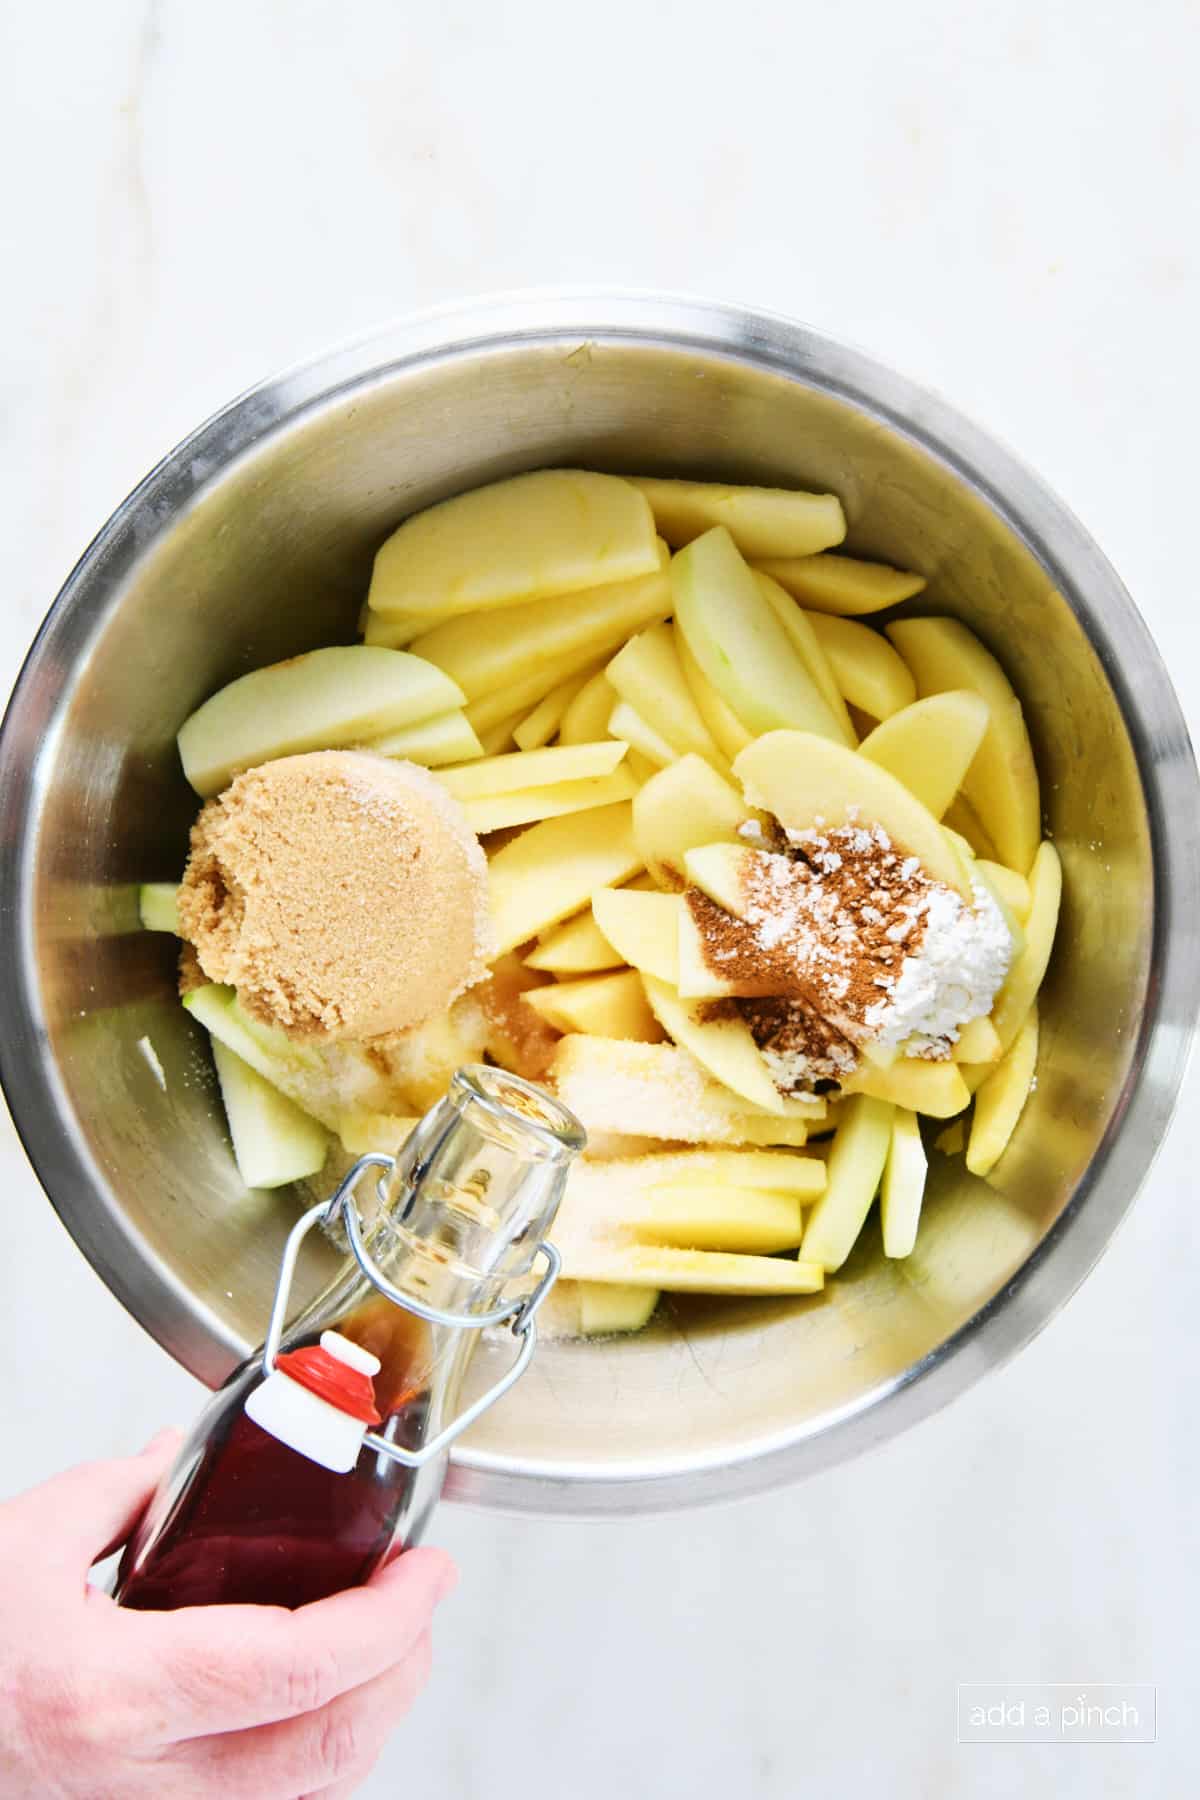
- Peel, core, and slice apples into 1/4-inch pieces. Toss with lemon juice in a large bowl. Add brown sugar, granulated sugar, apple pie spice, salt, vanilla, and cornstarch. Stir to coat the apple slices.
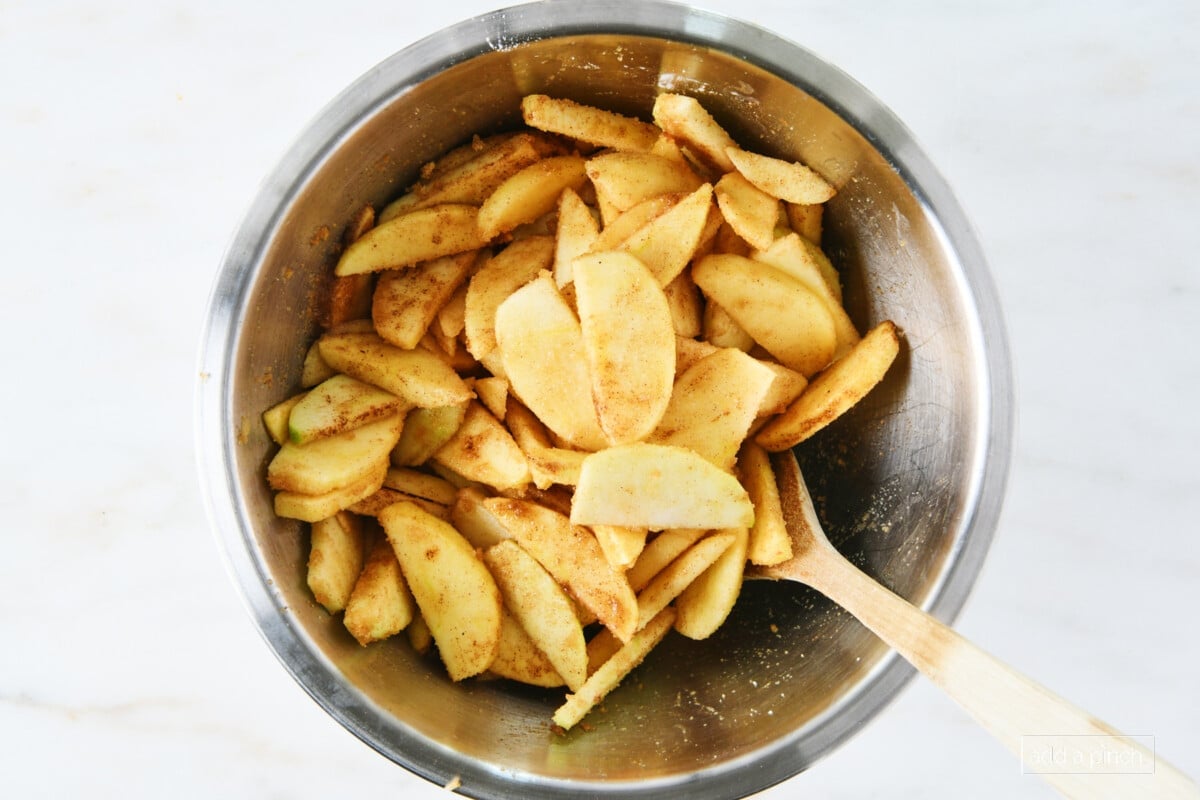
- Stir to coat the apple slices evenly. As an option, pre-cook the filling in a Dutch oven or skillet over medium heat for 5 minutes until slightly tender. Let cool slightly.
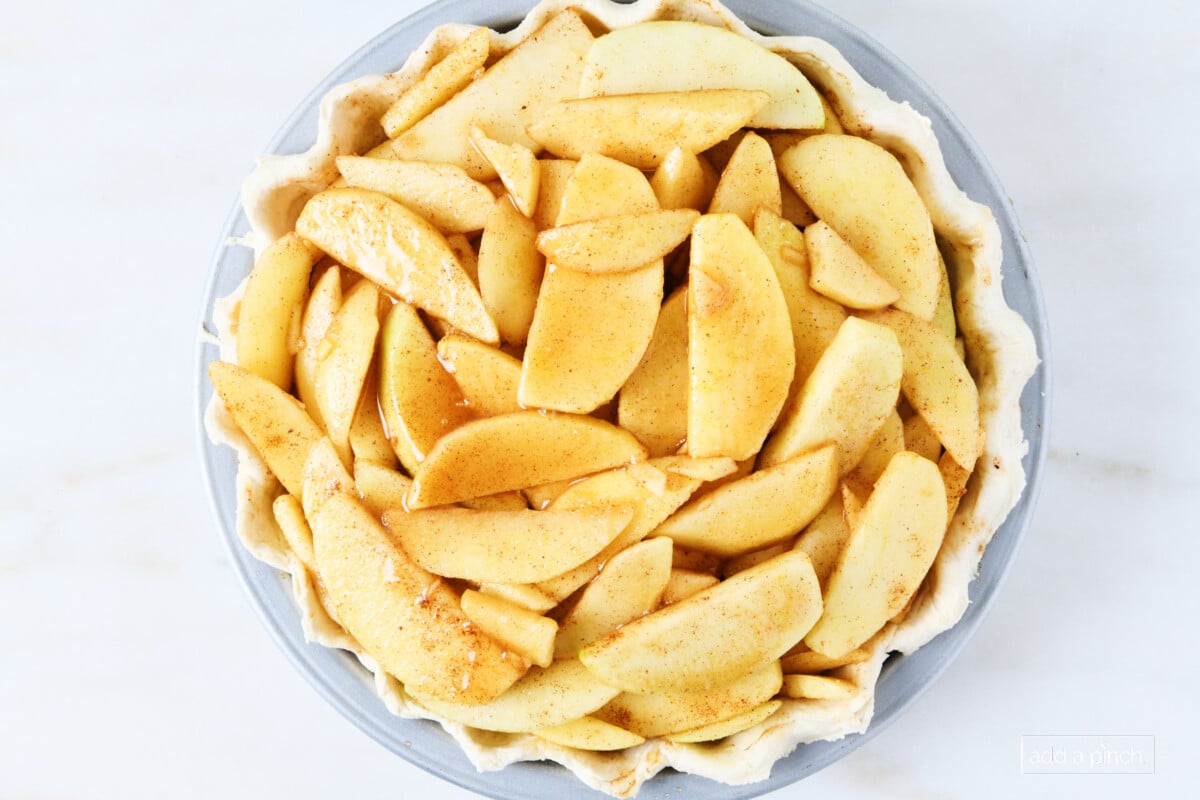
- Remove pie plate from freezer. Pour apple filling into the bottom crust, mounding a little in the center. Make sure not to get any on the edges of the pie dough, as it will prevent the pie from sealing properly.
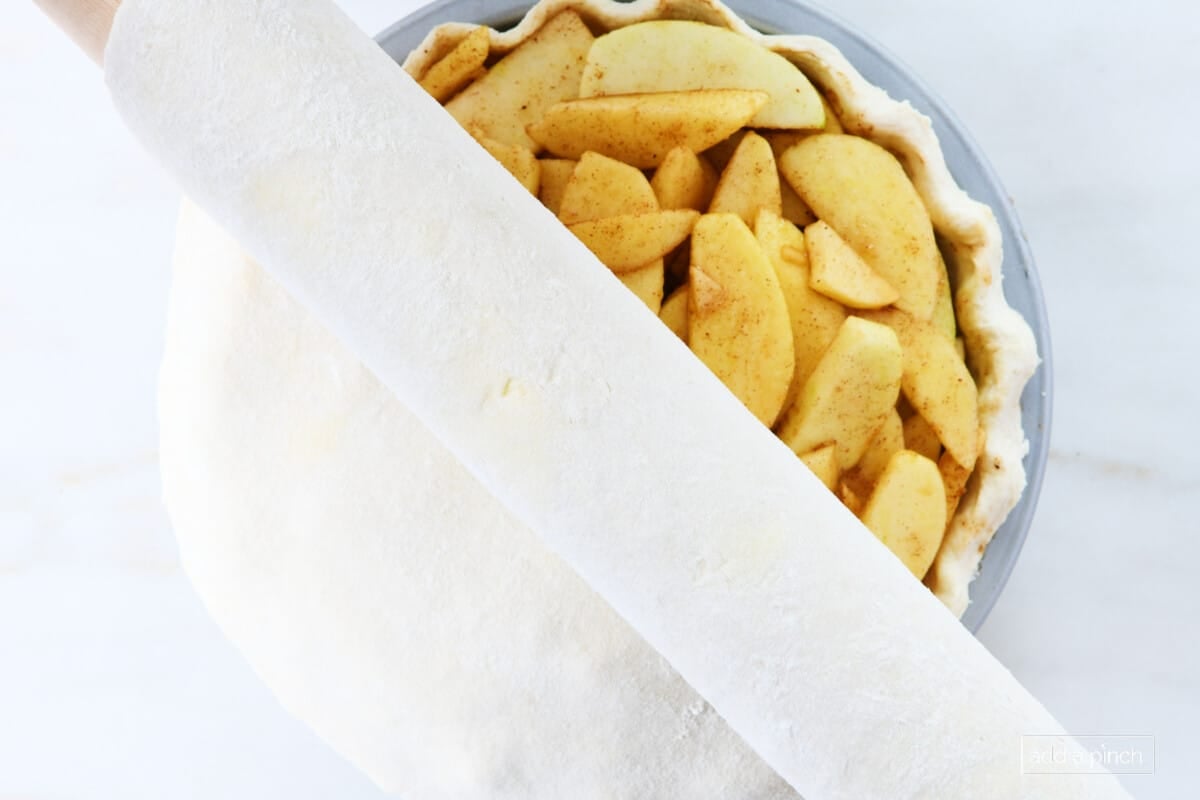
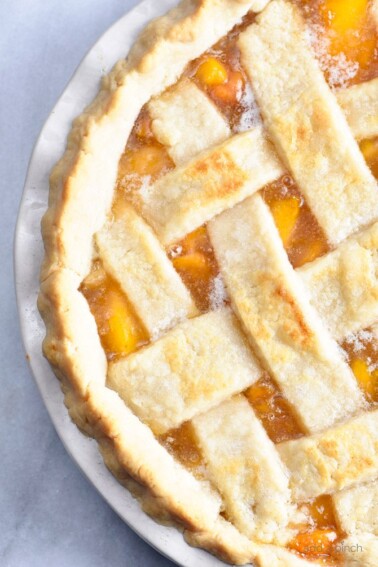
- Roll the second pie crust on a lightly floured surface and place it on top. Using the pie plate as a guide, trim away any excess pie dough. Crimp the edges of the top crust to the bottom crust to seal. (Alternatively, you can make a Lattice Crust of the second pie dough by cutting the second pie dough into about 10 even-width strips using a pizza cutter and arranging in a woven lattice pattern on top.)
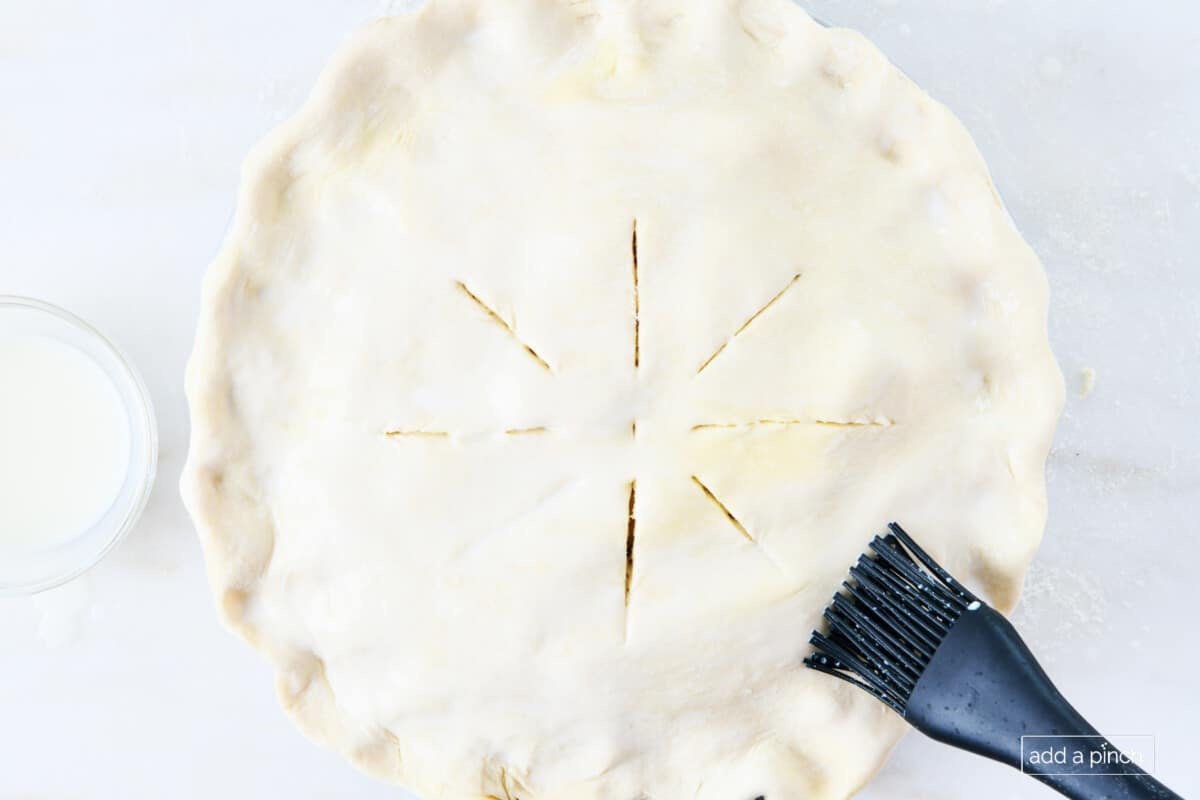
- Use the paring knife and cut slits in the top crust for ventilation. Brush the top crust with milk and sprinkle with additional sugar or coarse sugar, if using.
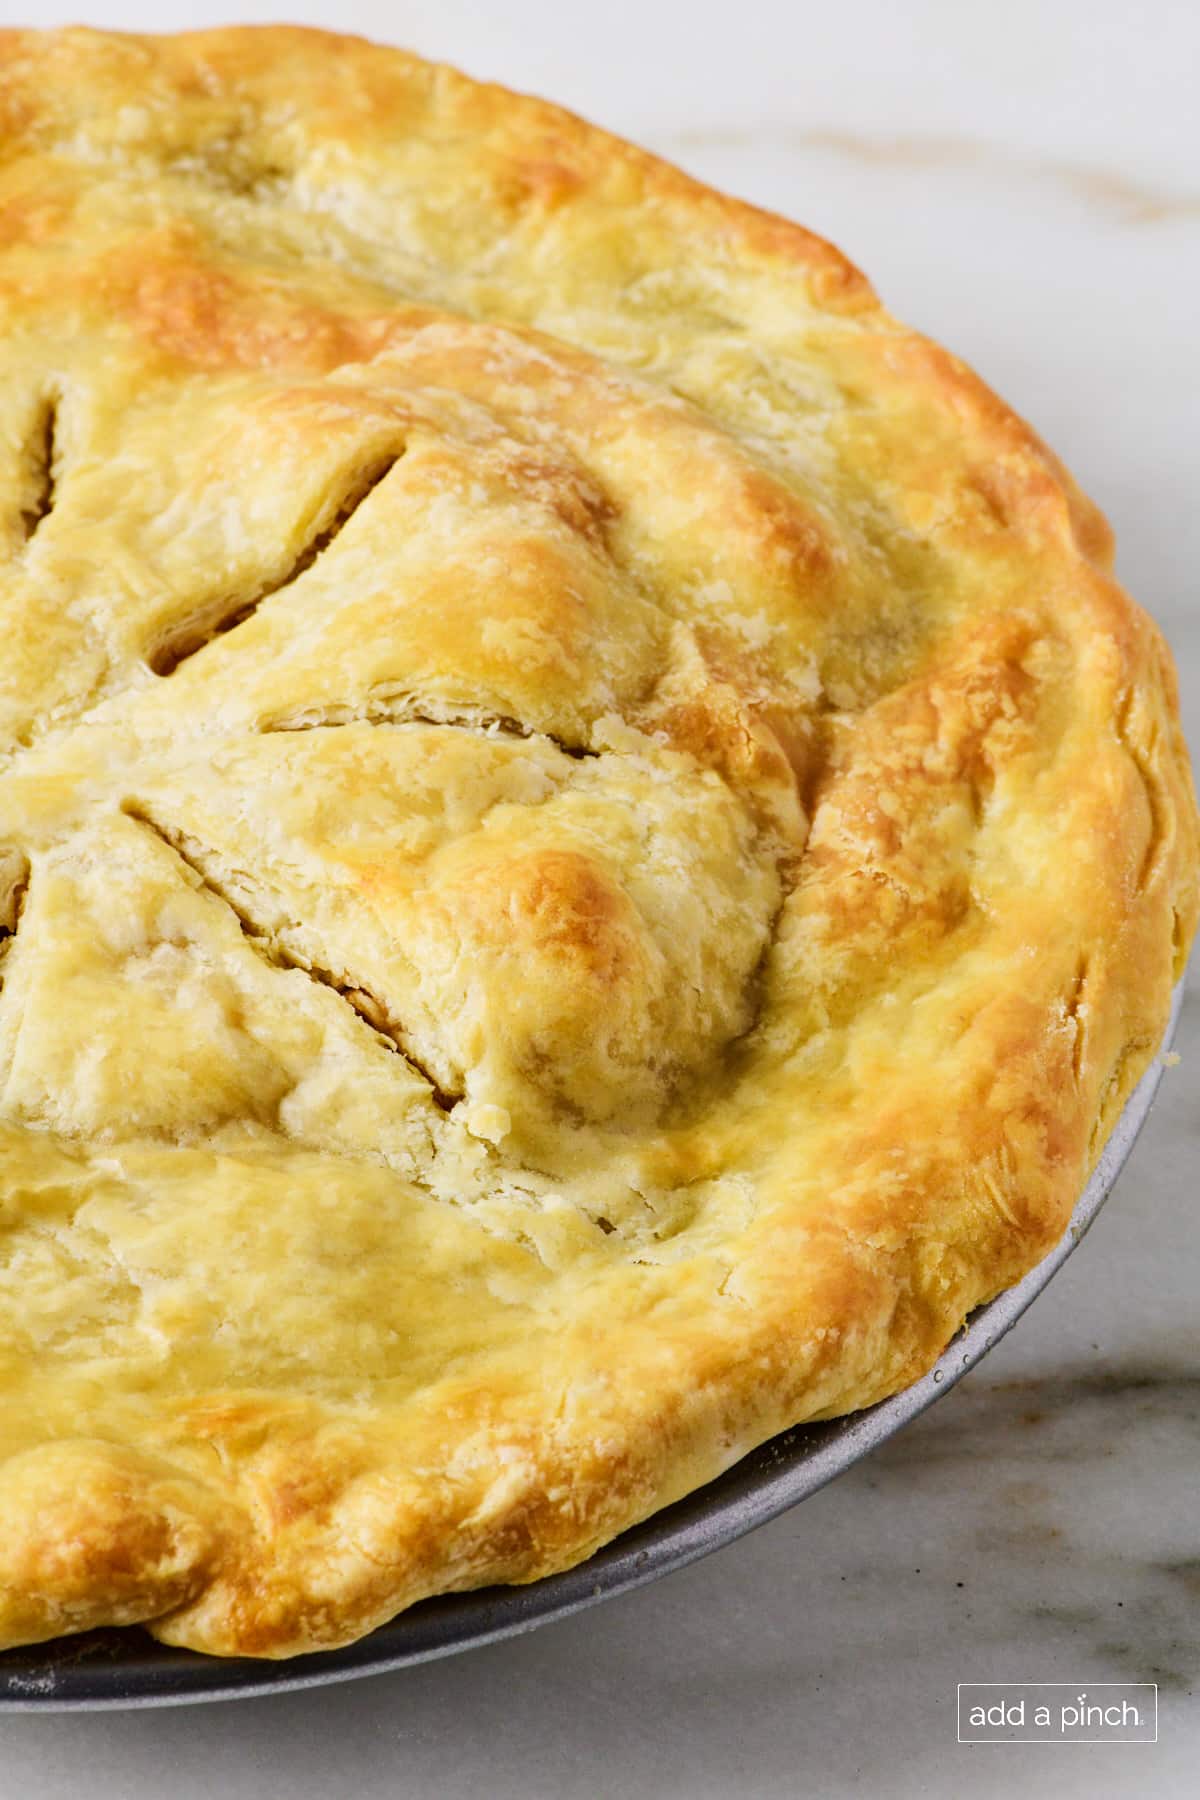
- Place onto a rimmed baking sheet to catch any drippings and bake for 45-50 minutes, until the top crust has browned and filling is bubbly. Cover edges with foil if browning too quickly. Remove from the oven and cool for 1 to 3 hours before slicing for the filling to set. It will be too juicy if sliced while the pie is still warm.
Make Ahead Pie Crust Option
You can get a head start on making this apple pie by making your pie dough ahead of time. Place one in the pie plate, wrap well with foil, and freeze. Make the second pie crust, form it into a disc, wrap it well with plastic wrap, and store it in the refrigerator for up to 3 days. Remove the second crust from the refrigerator while you prepare the pie filling to make it easier to roll.
Recipe Variations
- Caramel Apple Pie: Drizzle 1/4 cup caramel sauce over the filling before adding the top crust.
- Mini Pies: Divide into 4-6 mini pie tins; bake for 25-30 minutes.
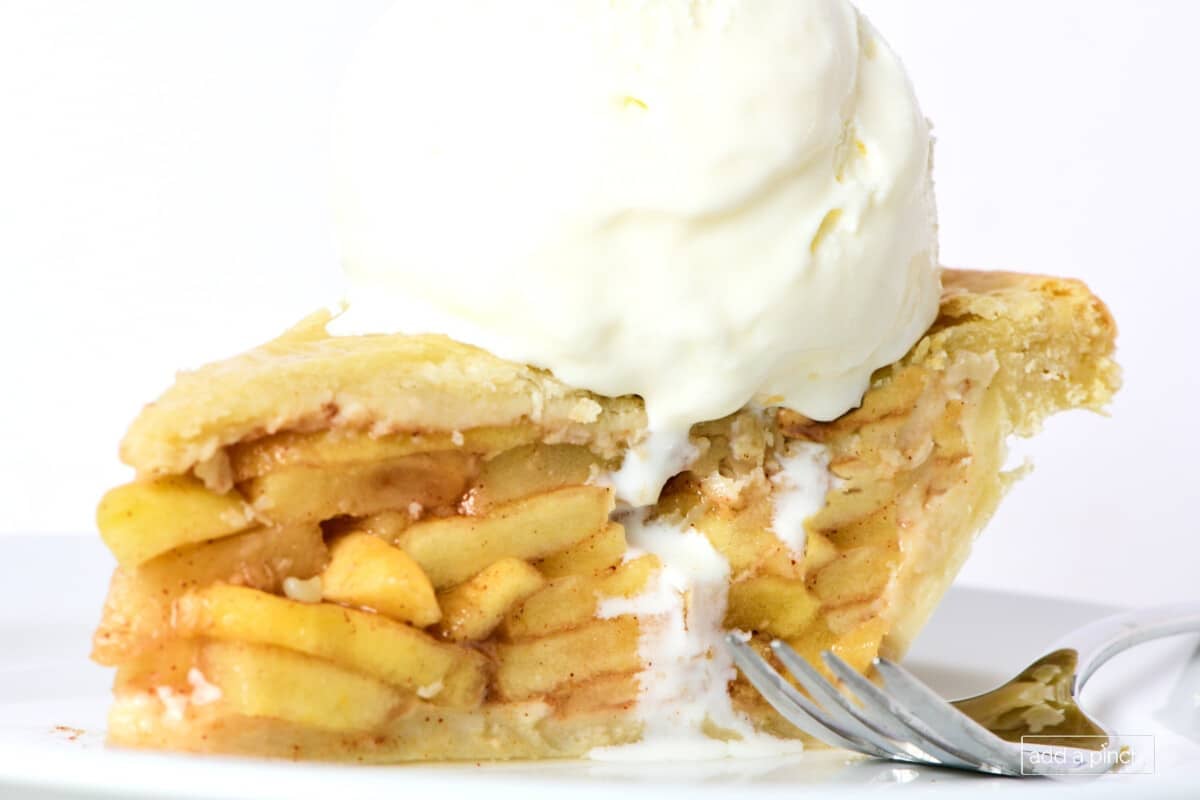
- Apple Pie à la mode: Top warm slices of pie with vanilla ice cream.
Recipe Success Tips
- Pick the Best Apples: Mix tart (Granny Smith), baking apples (Cortland, Braeburn, Rome) for their tenderness, and sweet, crisp apples (Honeycrisp, Fuji, Sweetango) for the delicious flavor and texture.
- Make Pie Crusts Ahead: As an option, make the pie crusts ahead as directed in recipe notes.
- Chill the Crust: Freezing the bottom crust as directed makes the best base that’s not soggy.
- Don’t Ignore Cooling: Allowing the baked pie to cool for at least 1 hour sets the filling.
- Prevent Over-Brown Crust: Use foil to cover edges if they brown too fast.
- Test for Doneness: Look for a golden crust with bubbly filling through the vents of the top crust.
Storage Tips
- Store: Cool completely. Wrap tightly and store at room temperature for 1 to 2 days or in the refrigerator for up to 7 days.
- Freeze Unbaked: Assemble pie in a freezer-safe pie plate, wrap tightly, and freeze for up to 3 months. Thaw overnight in the fridge and bake as directed.
- Freeze Baked: After baking pie using a freezer-safe pie plate, cool completely, wrap tightly, and freeze for up to 3 months. Thaw in the fridge overnight and serve cold or at room temperature.
- Freeze Apple Pie Filling Only: Mix filling, store in a freezer-safe container for up to 3 months, thaw in the refrigerator overnight, and use in a fresh crust.
- Reheat: Warm slices in a 300°F oven for 10-15 minutes or microwave for 20-30 seconds.
Frequently Asked Questions
A mix of tart Granny Smith, tender baking apples like Braeburn, and sweet Honeycrisp or Fuji works best for balanced flavor and texture. See the recipe notes and post for more options.
For a clear and glossy apple pie filling, I recommend using cornstarch. It takes more all-purpose flour than cornstarch to thicken the filling. The flour can give a cloudy appearance to the filling and can leave a flour taste in the recipe.
Fruit pies such as this apple pie can be stored at room temperature for one to two days or in the refrigerator for up to 7 days.
Source: USDA
It is not necessary, but it will make the apple slices very tender in the baked pie, if you prefer. This easy apple pie recipe does not require the filling to be pre-cooked before baking, but does give directions if you wish to do so.
Cool the baked apple pie for at least one hour to prevent juices from running if sliced without cooling. This allows the cooked pie filling to set, resulting in the prettiest pie slices.
Freeze the bottom crust as directed in the recipe before filling.
favorite pie recipes

Why This Apple Pie is a Family Favorite
This apple pie is more than just a dessert—it’s a family tradition that brings warmth, comfort, and nostalgia to every bite. Perfect for holidays or any day you crave it, this is a recipe you’ll turn to again and again.
Apple Pie Recipe
Equipment
Ingredients
- 2 (9-inch) pie crust recipe
- 5 medium (910 g) apples, peeled, cored, and cut into 1/4-inch slices (see notes for recommended apples)
- 1 tablespoon (14 g) lemon juice
- 1/2 cup (107 g) brown sugar
- 1/4 cup (50 g) granulated sugar
- 1 tablespoon (6 g) apple pie spice, or ground cinnamon
- pinch (0.4 g) Kosher salt
- 1 1/2 teaspoons (7 g) vanilla extract
- 1 tablespoon (10 g) cornstarch
- 2 tablespoons (29 g) milk, or use an egg wash (1 egg + 2 tablespoons water lightly beaten)
- 1 tablespoons (18 g) coarse sugar, optional
Instructions
- Prep. Preheat oven to 350º F.
- Make the pie crust. Prepare 2 (9-inch) pie crust recipe. Place the bottom crust into the pie plate and freeze as directed. Roll the second pie crust and set aside while preparing apple pie filling.
- Prepare the apple pie filling. Toss the apple slices with the lemon juice to coat them to prevent them from darkening. Add the brown sugar, granulated sugar, apple pie spice, salt, vanilla extract, and cornstarch.
- Assemble the pie. Remove the pie plate from the freezer and pour the apple mixture into the bottom crust. Top with the second pie crust and turn the bottom crust on top of the edges of the top crust. Crimp or press closed. Cut slits into the top of the pie crust, and place on top of a rimmed baking sheet to catch any drippings. Brush the top of the pie crust dough with milk and sprinkle with the coarse sugar, if using.
- Bake the pie. Bake for 45 – 50 minutes, until the top crust has browned. Remove from the oven and allow to cool for 1 to 3 hours before slicing.
Notes
Storage Tips
- Store: Cool completely. Wrap tightly and store at room temperature for 1 to 2 days or in the refrigerator for up to 7 days.
- Freeze Unbaked: Assemble pie in a freezer-safe pie plate, wrap tightly, and freeze for up to 3 months. Thaw overnight in the fridge and bake as directed.
- Freeze Baked: After baking pie using a freezer-safe pie plate, cool completely, wrap tightly, and freeze for up to 3 months. Thaw in the fridge overnight and serve cold or at room temperature.
- Freeze Apple Pie Filling Only: Mix filling, store in a freezer-safe container for up to 3 months, thaw in the refrigerator overnight, and use in a fresh crust.
- Reheat: Warm slices in a 300°F oven for 10-15 minutes or microwave for 20-30 seconds.
Nutrition
Nutrition information is automatically calculated, so should only be used as an approximation.
Grandmother’s Apple Pie
With dustings of flour flying all over my kitchen as a young bride, my spirits soared as I mastered my first apple pie as a newlywed.
I felt pride in serving it to my husband and my parents, who were visiting for supper that evening, as we finished our meal. I’d been on the phone with my Grandmother every step of the process, and she had talked me through it all.
Years later, as I poured the apples into the pie plate and then gently placed the second crust of my homemade pie crust atop all of the apples, I felt the warm flow of tears on my cheek.
It was the fall of the year my Grandmother passed away on Easter Sunday, and the weightiness of her passing finally hit me.
Now, as I make apple pie, my heart isn’t as heavy as it was that year following her passing. I realize the gift she gave me was much more than her pie recipe; she selflessly gave me love, and most importantly, the understanding that life passes quickly, but the legacy you leave behind is the lifetime of simple moments you share with those you love.
She truly made me feel like one of the most special people in her whole world and through her time and love, instilled in me the confidence and courage to try new things.
I remember telling her during that pie-making phone call how I was so nervous that it wouldn’t turn out like hers. “What if it isn’t right, Grandmother?” I’d asked her.
“Well, honey, it’s just pie. You can always try again tomorrow.”
And my love of experimenting in the kitchen was born.
Enjoy!
Robyn xo
From the Add a Pinch recipe archives, originally published 2013. This post has been updated to include step-by-step photographs and success tips.


I have been searching for years for a recipe that does my own grandparents apple pie justice and this has done just that. Thank you for sharing, grandmothers are sacred. Only tweak I did however bake covered for 10 mins at 400 and then did the remaining time at 350 as my grandparents always baked at the higher heat for the first 10 mins.
I have made this apple pie recipe for over 50 years and also do the pastry the same. Learned it from my mother and grandmother. I did change the pipe from a two crust apple pie to a Dutch apple pie. We love the mixture of flour, brown sugar, a little white sugar and butter. Mix until s nice crumble – not too small and then sprinkle on top of the apples. You do have to place a piece of foil on top after 25-30 minutes of baking to keep the topping from burning. Just gives an extra bit of flavor and a gorgeous pie.
Made this today and this is the best apple pie I’ve ever had – from the flaky crust to the rich brown, delicately spiced filling, it was perfect! I thought three quarters cup of sugar might make the filling too sweet but no, the balance of tart and sweet was just right. I just added a teaspoon of lemon peel to the crust which I retained from my old apple pie crust recipe. Loved your potato soup too and now this too is going to be my go to pie recipe. I love the way your simple instructions produce such complex flavours. Stay blessed, Robyn.
Thank you, Sunanda. I am thrilled you like my recipes.
Oops, meant lemon zest not peel!
I’m so happy you are enjoying my recipes, Danna, and that you love the apple pie. It is one of my family’s favorites. Thank you. xo
This apple pie with blue cheese on the side. There won’t be any remaining pie to put in the fridge.
It’s just the best pie recipe. I love all your recipes and I tried a few they’re easy to follow and foolproof.
This pie was the perfect combination of a delicious crust and a soft and gooey filling it looks beautiful too.
I’m so happy you are enjoying my recipes, Danna, and that you love the apple pie. It is one of my family’s favorites. Thank you. xo
Made it in a college dorm for Thanksgiving with friends! This recipe got me so many compliments and was so easy to put together! Thank you so much for this wonderful recipe!
That is awesome, Caroline! I’m so glad everyone loved it.
This is my 9th time making this pie this summer for my fam. They LOVE it!
Wow! I’m so glad your family loves this pie so much, Anna. Thanks for letting me know. xo
Looks Wonderful! You made me cry at the memories of your grandmother. You were so lucky to have her. Bless you..
Hope you enjoy the apple pie, Delores. I was so fortunate to have the time I spent with my grandmother. She was such a very special lady. I miss her every day.
Pictures look great. I plan on making this Sunday
I made this apple pie and the crust today for my family for tonight‘s dinner. It was perfect! The crust was very flaky and tender and flavorful. I sprinkle the top with white sugar after a light coating of milk. Are used Granny Smith apples. They were small so I used about twice as many apples. I didn’t have all spice so I added close to my pie spice mix. And I added more than a tablespoon. It was very flavorful and Delicious. I served it with French vanilla ice cream. Not only did it taste wonderful, it also looked as beautiful as the picture in your recipe. Thank you!
This makes me so happy to hear, Pam! I’ve loved this pie crust – and this apple pie – recipe for so many years and I’m thrilled to hear that you and your guests enjoyed it too! I know it was just beautiful when you served it! Thanks! xo