
Make your own chocolate bunny with just two simple ingredients! Perfect for gift giving for Easter!

Chocolate bunnies have always been a tradition in my family for Easter. The Easter Bunny would always leave a chocolate bunny in my basket and Mama would always have them around for decoration throughout the Easter season, too. I’ve carried on the tradition in my own family, but decided to make them myself years ago. I thought I’d share with you how easy they are to make.
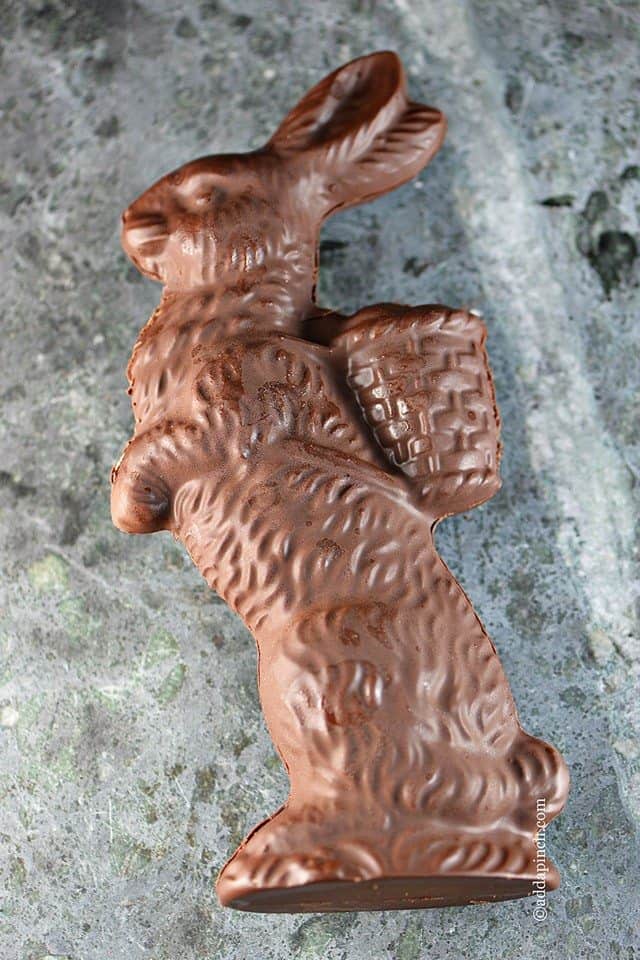
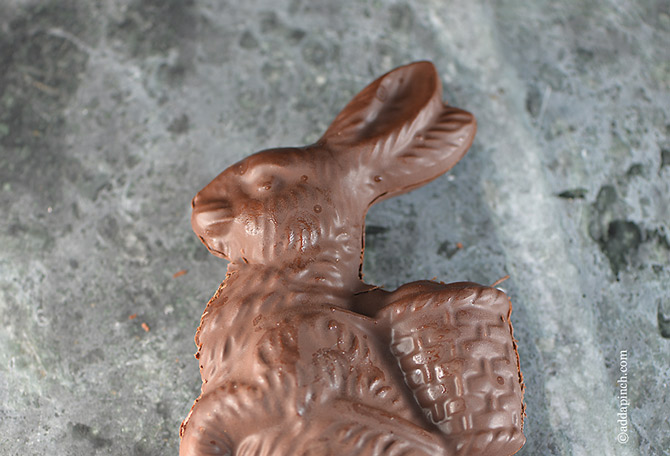
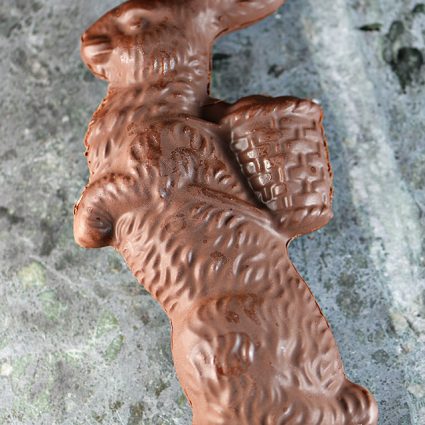
You can usually find candy molds in the shape of a bunny at Hobby Lobby, or other local craft stores, Walmart, Target, etc. I purchased this one online for a large bunny with a basket. I think he’s a cutie.
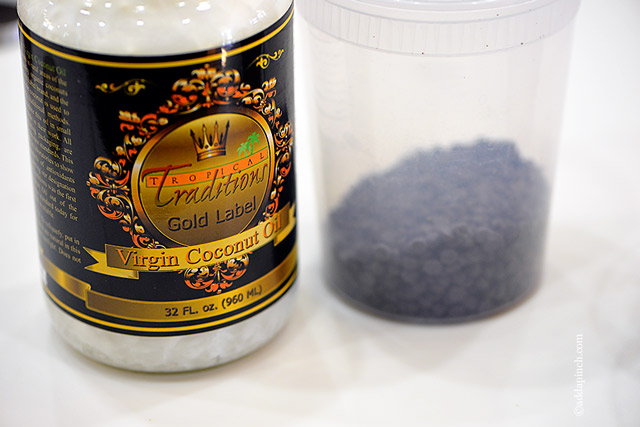
Start with your favorite chocolate chips or a chocolate bar that you’ve chopped into smaller pieces. Semi-sweet chocolate, dark chocolate, white chocolate, you name it. Whichever type of chocolate you prefer works for these. You’ll also want to grab some coconut oil to use with these.
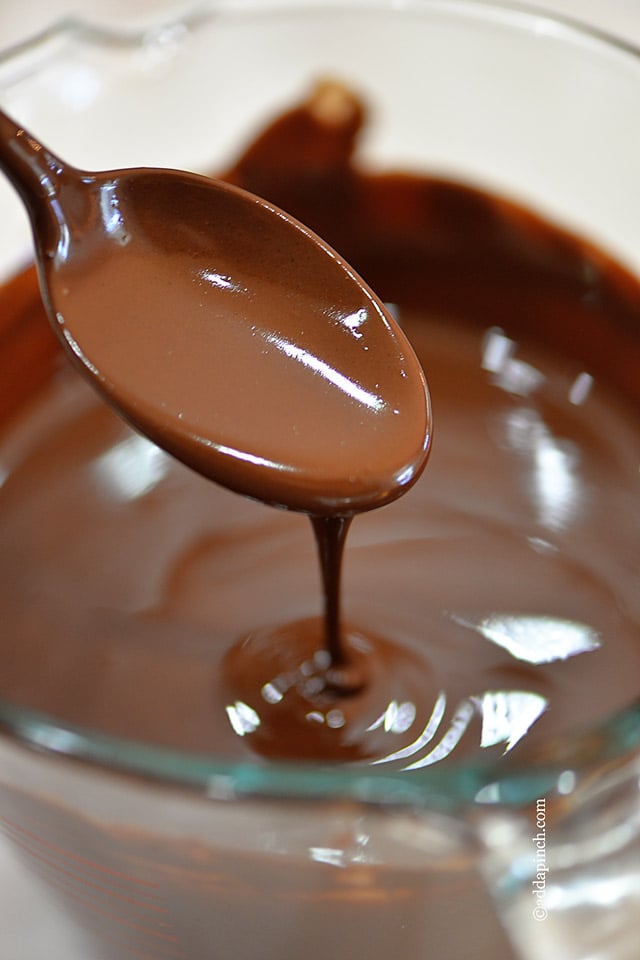
Add your chocolate and coconut oil to a large, microwave safe measuring cup or bowl with a pour spout and microwave according to the directions in the recipe. Stir well until the chocolate is smooth.
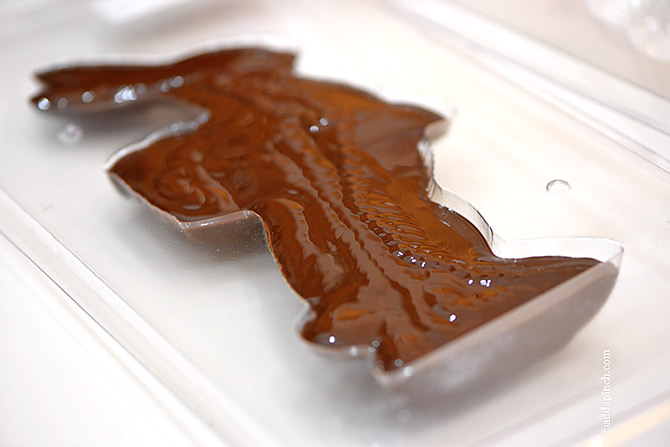
Pour the chocolate into your mold and let it dry until has hardened. The time will vary depending on your mold. Once your chocolate bunny has set, place it into the freezer for about 15-30 minutes to loosen it from the mold.
Carefully remove it from the mold and wrap in cellophane if you’d like for gifting.
Here’s my recipe for how to make a chocolate bunny. I hope you have fun!
How to Make Chocolate Bunny
Ingredients
- 1 cup (170 g) chocolate chips
- 2 teaspoons (8 g) shortening
Instructions
- Place all ingredients into a microwave safe bowl with a pour spout for easy dispensing. Melt in microwave for 1 1/2 – 2 minutes at 70% power. Remove from microwave and stir until smooth.
- Pour chocolate into candy molds, repeating until molds are filled. Allow to sit in a level area until the chocolate has dried and hardened. Place into freezer for about 30 minutes to easily release from mold.
Nutrition
Nutrition information is automatically calculated, so should only be used as an approximation.
Happy Easter!
Robyn xo


How do you make the back of the bunny flat or do you bother?
Hi Nancy,
When I’ve made it, it’s always turned out fairly flat once it sets in the mold. Hope you enjoy it! xo
The semisweet popped right out! I can’t get the white chocolate ones to break loose. Any suggestions?
I’m definitely going to look for these molds.guess you could add nuts or raisens in the molds too.
I made this for easter, my kids loved it! I can’t believe I bought them in the store all these years. It’s much more fun making them myself, with a little help from the smaller versions of me.
Very cute! My son would go crazy over this. Even I’d love to receive one!
He looks so professional!
Thank you for the DIY!
This is so charming! Now I am dying to get a mold, maybe they’ll be on sale next week!
I be you are right, Sue. I’ll be looking for more of them, too! This one cost about $8 that I used.
Robyn,
These look so adorable. Bet your kids loved making these. Happy Easter.
Annamaria
BTW – should it be 70% power instead of 7%?
Yes! He had a ball making them, even though he thinks he’s getting too old for that sorta thing. Ha!
And YES! It should be 70% power! I’ve updated to fix. Thanks for catching that!
Happy Easter!
Wow – I’m finding this recipe the same day you’ve posted it! What timing!
Do you know if there would be any problem pouring the chocolate into a metal mold instead of a plastic one? I have this petit fours mold that I got as a gift years ago and I’ve never used it. I got the idea to make a variety of chocolates with it to bring to my in-laws house tomorrow. I’d hate for them not to firm up because I used the wrong kind of mold!
You should be fine using a metal mold, Nicole. What a great idea. The freezer trick should force them to release from the metal as well. Happy Easter!